


If you’re playing fewer rounds than you’d like and can feel your game slipping between them, the fix is probably fifteen feet out your back door. How to practice golf in the backyard comes down to three decisions, in order: assess your space, match equipment to it, and build a routine you’ll keep.
Key Takeaways
- Short-game surface is the single highest-ROI piece of backyard gear — it’s the part of golf you can realistically replicate at home, and the practice return per minute compares favorably to range sessions of equal length.
- Fifteen feet of clear length is the minimum viable footprint for most amateurs; 10–15 feet supports a chipping net, 15–20 feet plus ~10 feet of overhead supports a full-swing net, and a putting mat works in as little as 6–8 feet.
- Quality turf rolls in the 9–11 Stimpmeter range, which matches typical public and municipal courses.
- Distributed practice beats massed practice. A peer-reviewed systematic review found golfers who spread reps across multiple days significantly outperformed those cramming the same work into single sessions.
- Run a three-part daily routine — warm-up, focused skill block, pressure drill — in 15–20 minutes. Frequency, not volume, is what retains skill.
Setting Up Your Backyard Golf Practice Area the Right Way
The most expensive mistake amateurs make is ordering gear before they’ve walked the yard with a tape measure. Learning how to practice golf in the backyard starts with three decisions — space, equipment, and safety — made in that order.
Assessing Your Backyard Space Before You Buy Anything
- Measure length, width, and overhead clearance in every direction you might swing.
- Flag flat zones for a putting mat or chipping area; note slopes that need leveling.
- Map sight lines, fence height, and neighbor proximity to plan safe hitting angles.
- Confirm minimums: chipping nets work in 10–15 feet; full-swing nets need 15–20 plus overhead.
- Plan ~10 feet of vertical clearance for a driver swing, more if you’re over 6 feet.
If the yard doesn’t fit, don’t force it. Ten feet of flat side-yard turf makes a fine chipping lane; an open garage doubles as a bad-weather bay. Portable mats and fold-up nets let you start tomorrow — save the permanent install for once you’ve proven you’ll actually use it.
Space & Equipment Quick-Reference
| Setup | Minimum Length | Ideal Length | Overhead |
| Portable putting mat | 6–8 ft | 10–12 ft | None |
| Installed putting green | 8 ft | 15+ ft | None |
| Chipping net | 10–15 ft | 20 ft | 8–10 ft |
| Full-swing net | 15–20 ft | 25 ft | 10–12 ft |
| Hitting bay with mat | 15–20 ft | 25+ ft | 10–12 ft |
Choosing the Right Equipment for Your Backyard Golf Setup
Buy by tier, not by impulse.
- Starter (under $200): Putting mat, portable chipping net, foam or limited-flight balls. Right for renters, small yards, or anyone testing whether the habit will stick. A $40 mat used ten minutes a day for thirty days produces more retained improvement than one $400 range session a month — skill retention is about frequency, not volume.
- Mid-range ($200–$800): Hitting mat with wrist-friendly padding, full-swing net with a proper backstop, alignment sticks, impact bag. For weekly practicers working both short and full-swing fundamentals.
- Long-term Investment ($800+): Installed backyard putting green, premium fringe, approach pad underlay, optional launch-monitor-ready hitting bay. For specs on pile, infill, and base prep, see this guide to choosing the right backyard golf turf.
Match gear to your actual weakness, not what looks coolest. If you three-putt, buy a putting mat. If you can’t get a sand wedge airborne, buy a chipping net. The club you enjoy practicing and the club costing you strokes are almost never the same one.
If you’re weighing an installed green, the lowest-friction first step is ordering a putting green sample so you can feel the surface before committing.
Building a Safe and Functional Home Practice Setup
Treat setup like a pre-flight checklist.
- Position full-swing nets against a solid backdrop to contain mishits.
- Default to foam or limited-flight balls within ~20 feet of windows, fences, or foot traffic.
- Use a mat with wrist-friendly padding — cheap mats end more home practice habits than weather does.
- Mark the hitting zone so family and pets know to stay clear.
- Check local ordinances and HOA rules before any permanent install. Most artificial turf greens are low-profile and HOA-friendly, but get confirmation in writing.
Installing a Backyard Putting Green or Portable Putting Mat
This is the highest-leverage piece of any backyard golf practice setup.
- Artificial turf putting greens cut to almost any shape, roll like real surfaces, and last a decade-plus. A well-installed dedicated backyard golf green is the closest most amateurs get to a private practice facility. Sizing a golf putting green for backyard use is flexible — square footage and shape are driven by your yard, not the other way around.
- Portable mats are the lower-cost, no-installation alternative — right for renters, small patios, or skeptics not ready to commit.
- Spec the surface to a true speed. Quality turf rolls in the 9–11 Stimpmeter range, which matches most public and municipal courses — USGA guidance puts typical American course readings between 7 and 12 feet, with 9–10 being the sustainable range for most operations. Match home speed to the courses you actually play — a green rolling at 13 teaches nothing useful if your weekend course runs at 9.
- Pair the surface with quality putting green fringe and, for chipping work, an approach pad underlay — 5mm polyurethane foam, adds up to 20 yards of realistic approach distance, with better responsiveness and smoother roll.
Feel, touch, and distance control are perishable. A week off and you’ll feel it on the first lag. A surface that removes the friction of getting to the range is what keeps the gains you’ve already made from slipping.
Ready to compare installations? Browse backyard putting green options or read about replicating a golf course putting green at home. Once the setup is dialed, then you can begin to improve your game with home golf practice.
Building a Home Golf Practice Routine That Actually Improves Your Game
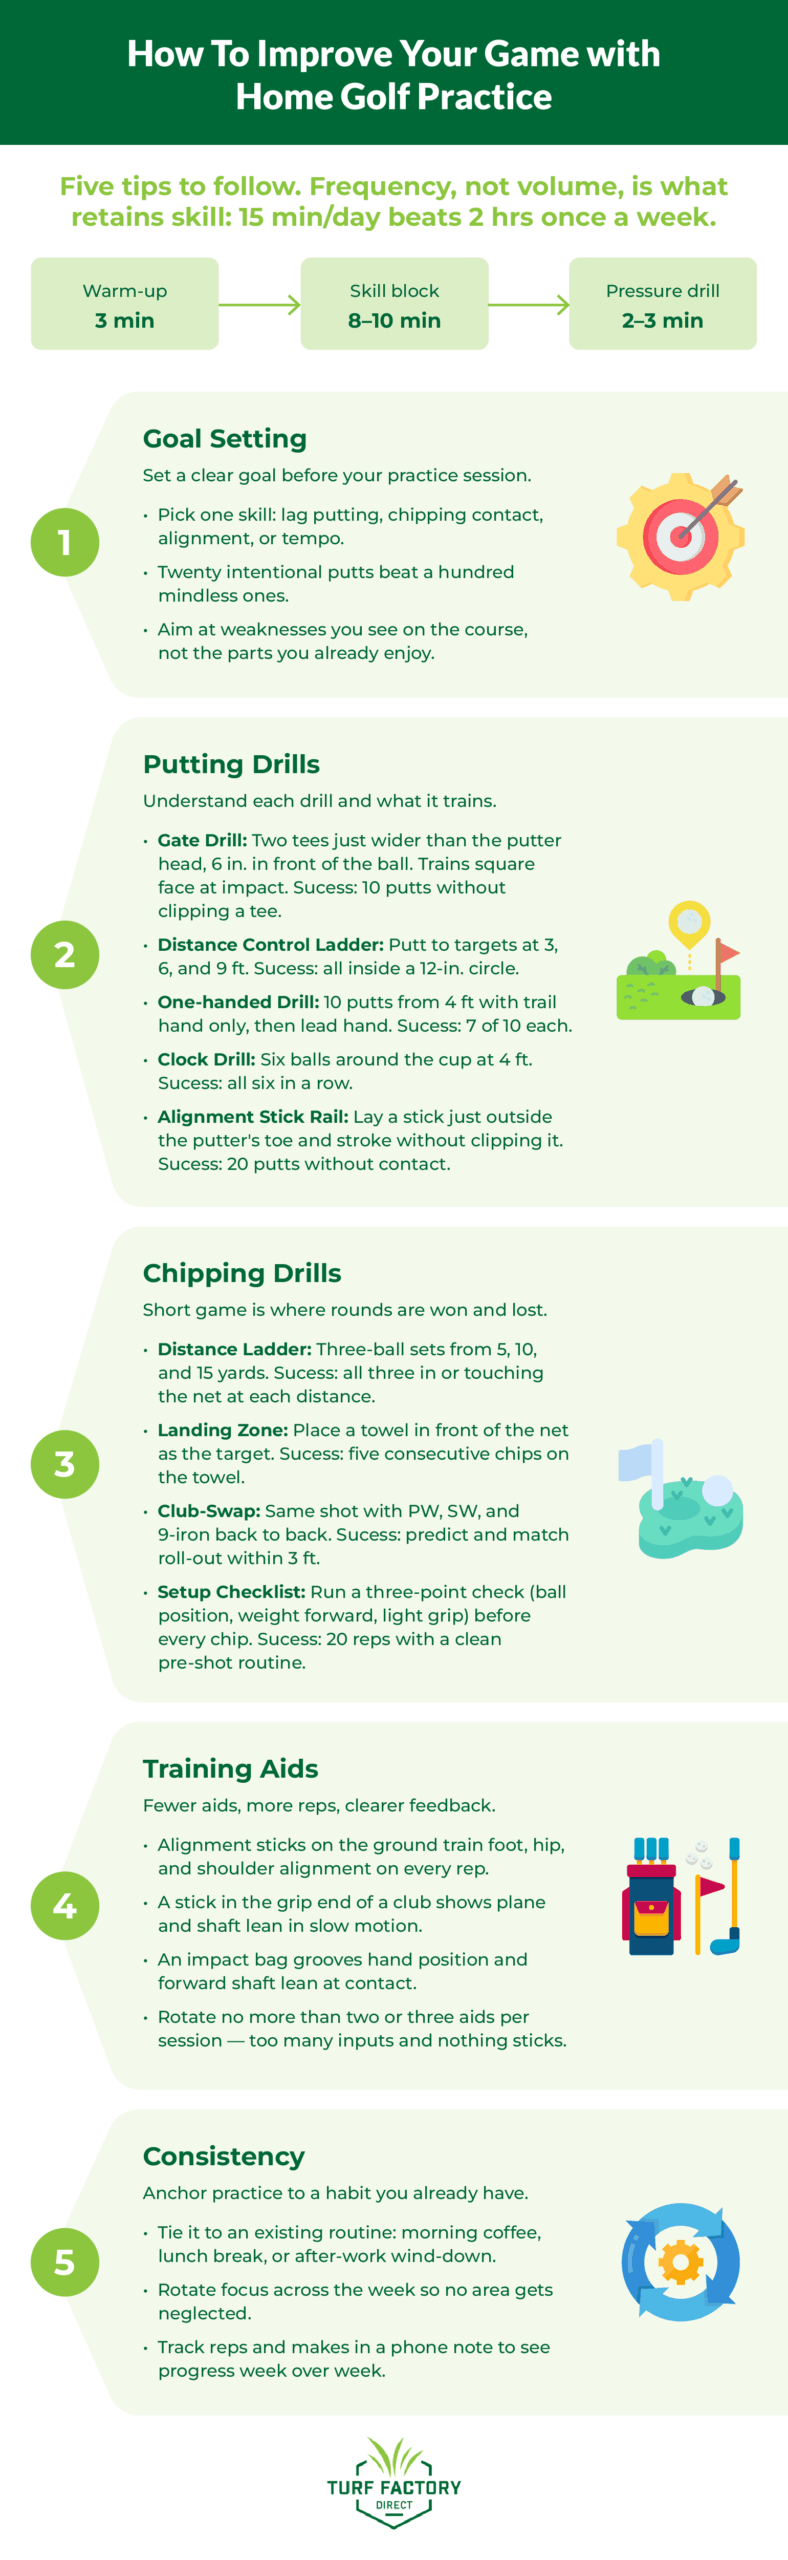
Equipment alone produces zero improvement. Learning how to practice golf in the backyard effectively means running a repeatable routine with clear goals, specific drills, and honest feedback on every rep. Use a three-part structure: 3 minutes warm-up, 8–10 minutes of focused skill work, and 2–3 minutes of pressure drill.
Setting Clear Goals Before Every Practice Session
- Name one skill — lag putting, chipping contact, alignment, tempo — before you walk outside.
- Twenty intentional putts beat a hundred mindless ones.
- Aim at the weaknesses you see on the course, not the parts you already enjoy.
The ego trap. Most amateurs practice whatever they hit well. At the range that’s beating drivers; at home it’s lagging twenty-footers while ignoring the knee-knockers that actually decide rounds. The club you enjoy and the club costing you strokes are rarely the same.
There’s science behind this. A peer-reviewed systematic review of motor learning in golf found that golfers who spread practice across multiple days significantly outperformed those cramming the same reps into one session. In plain English: fifteen minutes daily beats two hours once a week.
Putting Drills at Home
- Gate Drill — square face at impact. Two tees just wider than the putter head, six inches in front of the ball. Success: 10 putts without clipping a tee.
- Distance Control Ladder — feel across varying lengths. Putt to targets at 3, 6, and 9 feet. Success: all three inside a 12-inch circle.
- One-Handed Drill — hand and wrist control. Ten putts from 4 feet with only the trail hand, then the lead hand. Success: 7 of 10 with each.
- Clock Drill — confidence from every angle. Six balls around a cup at 4 feet. Success: make all six in a row.
- Alignment Stick Rail — repeatable stroke path. Lay a stick just outside the putter’s toe and stroke without clipping it. Success: 20 putts without contact.
Backyard Golf Drills for Your Chipping Net
Watch your regular group closely and you’ll see it: the thirty-yard-and-in game is where most rounds come apart. The return on an extra ten short-game sessions per month tends to beat an extra ten range sessions for most amateurs.
- Distance Ladder — three-ball sets from 5, 10, and 15 yards. Success: all three in or touching the net at each distance.
- Landing Zone Drill — place a towel in front of the net as the landing target. Success: five consecutive on the towel.
- Club-Swap Drill — hit the same shot with pitching wedge, sand wedge, and 9-iron back to back. Success: predict and match roll-out within three feet.
- Setup Checklist Drill — before every chip, run a three-point check (ball position, weight forward, light grip). Success: 20 reps with a clean pre-shot routine.
On foam balls: they’re why home chipping practice actually happens — high-volume reps next to windows or kids without damage risk. One caveat: foam balls don’t compress or spin like real balls, so use them as a contact-and-tempo tool, not a distance tool. The transfer is in the motion, not the flight.
Using Alignment Sticks and Training Aids to Reinforce Good Habits
The rule: fewer aids, more reps, clearer feedback.
- Lay alignment sticks on the ground to train foot, hip, and shoulder alignment on every rep.
- Slide a stick into the grip end of a club for slow-motion swings to feel plane and shaft lean.
- Use an impact bag to groove hand position, body rotation, and forward shaft lean at contact.
- Rotate no more than two or three aids per session. Too many inputs and nothing sticks.
Pair every aid with a specific drill and clear feedback. If you can’t tell whether the rep was good, the aid isn’t doing its job.
One honest limit on net work: A net trains tempo, rhythm, and contact. Without ball flight it can’t diagnose curvature — it’ll keep your swing from rotting between rounds, but it won’t fix a slice on its own.
Creating a Consistent Practice Schedule You’ll Actually Stick To
The fix for inconsistent practice isn’t willpower, it’s lower friction. Commit to 15–20 minutes daily, not occasional marathons.
- Anchor practice to an existing routine: morning coffee, lunch break, after-work wind-down.
- Rotate focus across the week so no area gets neglected.
- Track reps and makes in a phone note to see progress week over week.
Sample Weekly Backyard Practice Schedule
| Day | Focus | Drill(s) | Time |
| Monday | Putting — speed | Distance Control Ladder | 15 min |
| Tuesday | Chipping | Distance Ladder + Landing Zone | 20 min |
| Wednesday | Putting — face control | Gate Drill + Clock Drill | 15 min |
| Thursday | Full swing (net) | Tempo + alignment sticks | 20 min |
| Friday | Chipping + short putts | Club-Swap + Clock Drill | 15 min |
| Saturday | Play an actual round | — | 4+ hrs |
| Sunday | Rest | — | — |
Backyard practice is the realistic middle ground between “no practice” and a country club membership. The setup is cheaper and smaller than most amateurs assume, and fifteen focused minutes a day produces more retained skill than a single range session a week — the science of distributed practice is settled enough to bet on. Start with the part of the game you can actually replicate at home, and the rest of the routine builds itself around it.
Measure your space today. Then order a putting green sample so you can feel real turf before committing to anything larger — the lowest-friction first step in learning how to practice golf in the backyard, for less than a sleeve of premium balls. Ready to go further? Explore backyard putting green options sized to your yard.