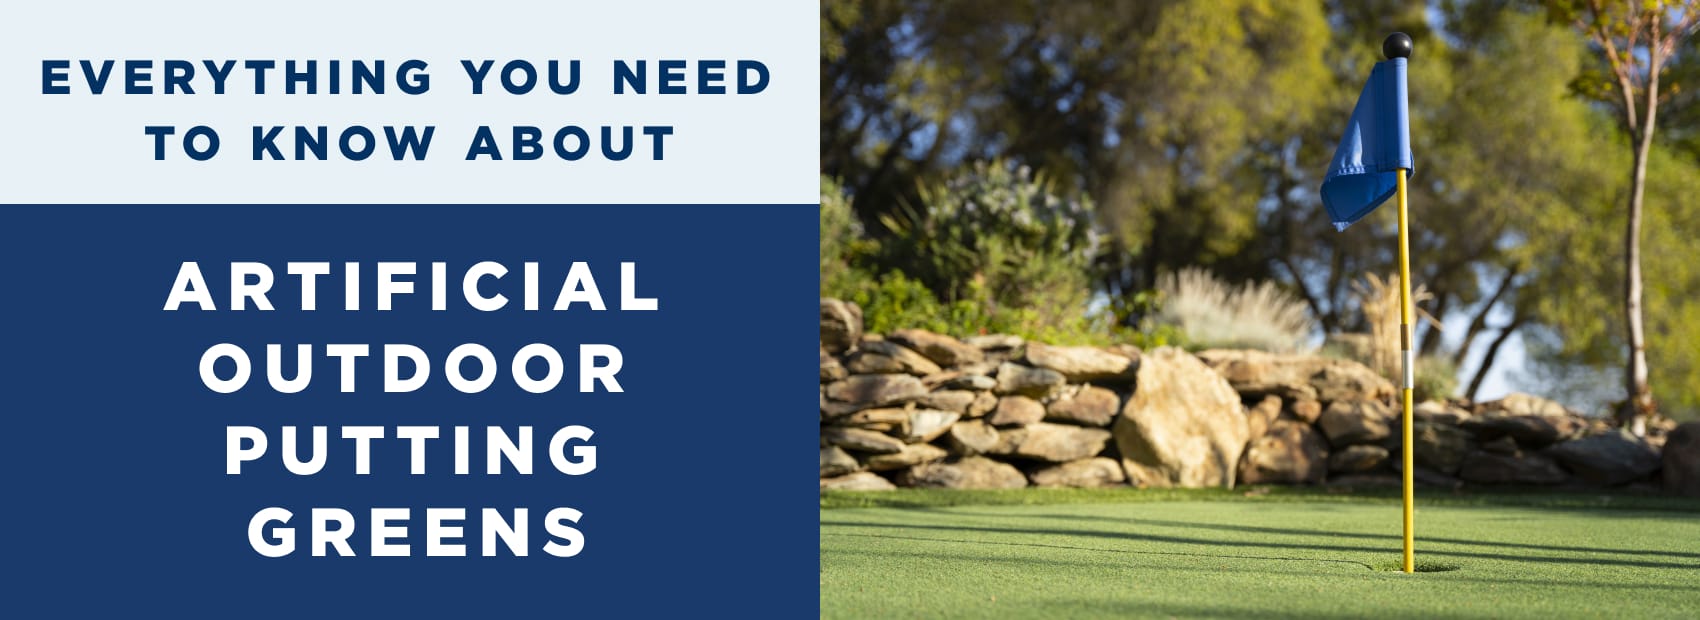
An artificial outdoor putting green looks like a turf-shopping decision: pick the most realistic grass, roll it out, start sinking putts. But the turf you can see only performs if the base, drainage, and infill beneath it are engineered to work together. You don’t want to end up with a slow, lumpy, puddle-prone green you regret every time it rains.
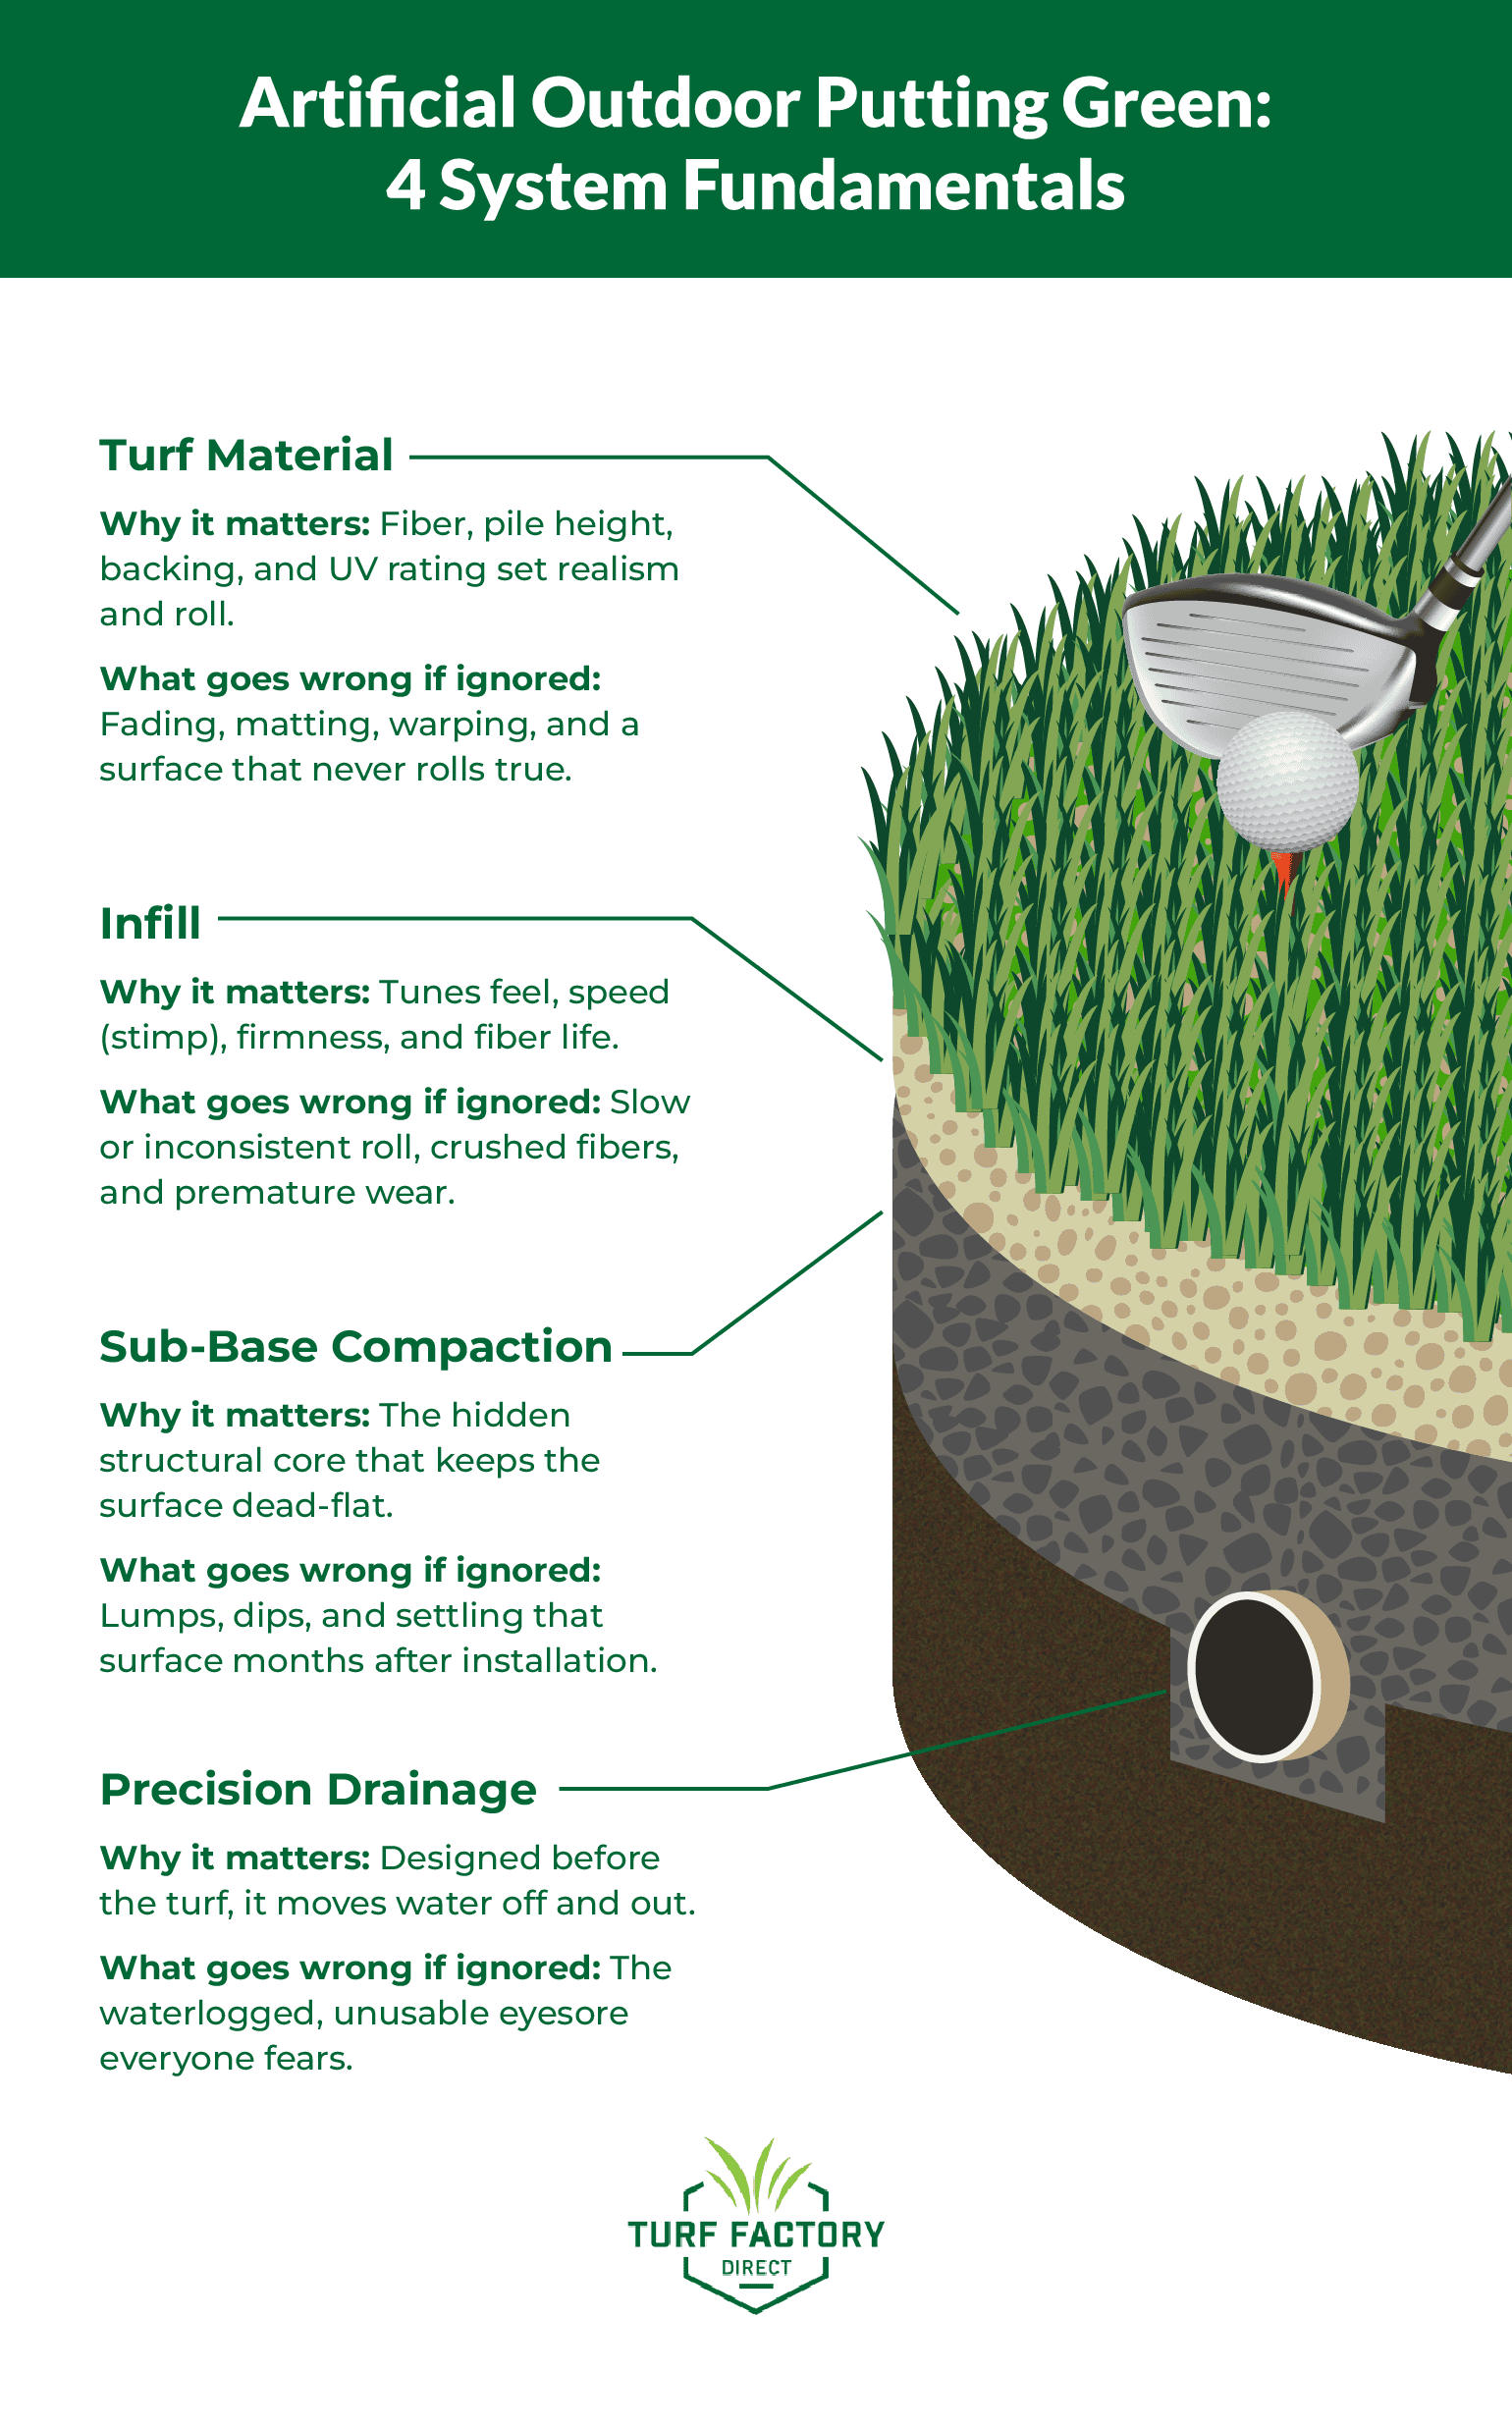
Four engineering fundamentals determine whether you get a tour-caliber surface or an expensive mistake. An artificial outdoor putting green system is composed of turf material, sub-base compaction, precision drainage, and infill. Nail these four plus a realistic cost and installation plan, and your green can hold a stimp 10–12 surface for 15 to 20 years. Miss one, and the other three can’t cover for it.
Key Takeaways
- DIY the surface, hire out the structure. Laying turf and infill is doable; the base and drainage are the high-risk phases where amateur greens fail.
- Budget in ranges and price the hidden items. Installed greens run roughly $15–$40 per square foot, with base and drainage often about half the total.
- Maintenance is light but not zero. Brush, clear debris, top up infill, and check drainage to protect the speed you paid for.
The Engineering Blueprint: What Separates a True-Rolling Artificial Outdoor Putting Green From a Costly Mistake
You must build from the ground up. The turf is what you see and touch, but it rides on a base, drains through an engineered path, and gets its speed from infill, each layer leaning on the one beneath it.
Choosing the Right Turf Material: The Foundation of Playability and Realism
Good artificial outdoor putting green is short, dense, and stiff enough to hold a ball up so it rolls instead of wallowing. Three fibers dominate the category: nylon, polyethylene, and polypropylene, and each has a clear best use.
| Fiber type | Roll / realism | Durability | Best for |
| Nylon | Fast, firm, very true | Excellent; springs back | Higher-speed surfaces; needs UV treatment for full sun |
| Polyethylene | Smooth, natural, true | Strong; UV-stable | Most outdoor putting greens |
| Polypropylene | Adequate when new | Mats and ruts over time | Tight budgets; light use |
Two specs carry the load. Pile height — the length of the fibers — should stay low, roughly half an inch to three-quarters of an inch. Lower pile gives the ball less to fight through, and that’s what makes a true, repeatable roll possible; tall landscape turf simply can’t putt. Backing is the layer that grips every fiber and lies against the base. Cheap, non-permeable backing is where you later watch bubbling, warping, and trapped water appear. Before you commit, ask for a documented UV rating and a permeable, dimensionally stable backing and choose the best putting green outdoor turf for your climate.
Stimp Rating and Ball-Roll Performance: Engineering the Competitive Edge
“Stimp” is shorthand for the Stimpmeter, the tool the USGA uses to measure green speed. The mechanism is almost comically simple: release a ball down a ramp at a fixed velocity and measure how far it rolls, in feet. Ten feet of roll is a stimp of 10, and the USGA demonstrates the correct measurement method from start to finish. On the scale golfers use day to day, 10 reads as medium; most everyday courses live at 9 to 10, and major-championship greens run 11 to 15. Which means a home target of stimp 10–12 genuinely matches tour conditions.
Three variables you control combine to set that speed: pile height (lower and stiffer is faster), fiber stiffness (nylon’s spring keeps the ball riding high), and infill density (you can dial in after the green is down).
| Stimp range | Feel | Comparable conditions |
| 7–8 | Slow, forgiving | Casual or older municipal greens |
| 9–10 | Medium | A typical well-kept course |
| 10–12 | Fast, true | Tournament-caliber practice |
| 13+ | Very fast | Major-championship extremes |
Here’s what the spec sheet won’t tell you. The number everyone quotes is the speed at the center of the green. The real mark of a quality install is consistency edge to edge. A green that reads 11 in the middle and 8 in the corners teaches you the wrong stroke. When roll comes out slow or unpredictable, the turf brand is rarely the problem. The usual suspects are pile height, too little or unevenly spread infill, and a base that isn’t truly flat. And that’s the catch with speed: you only get it if the surface underneath is dead-level. So we go underground.
Sub-Base Aggregate Compaction: The Structural Core Nobody Talks About Enough
This is where artificial outdoor putting greens are won or lost, and it’s the one part nobody photographs. Bad base compaction is the leading cause of lumpy, uneven putting surfaces, and because the failure shows up as settling weeks or months later, the turf is already down by the time you see it.
A proper base is a layered aggregate system, packed from the bottom up:
| Layer | Material | Typical depth | Purpose |
| Excavation | Remove sod and soil | 3–4″ (more in clay) | Make room so the finished green sits flush |
| Separation | Geotextile fabric | — | Keeps soft soil from migrating up into the base (vital in wet or clay ground) |
| Structural base | Angular crushed rock (≈¾”) | ~2–2½” | Interlocks under compaction; carries load and drains |
| Finishing layer | Decomposed granite / Class II road base | ~1–1½” | Fine particles fill the voids for a smooth, dense top |
Two habits separate a pro base from a DIY heartbreak. First, compact in thin lifts, never all at once. Pack each layer to roughly 90%-plus density with a plate compactor, watering as you go, so the air gets driven out instead of buried. Dump it all in and compact once, and it settles unevenly later. Second, angular stone, not round gravel. Angular faces wedge together and stay put; round pebbles roll and drift. Depth flexes with conditions; freeze-thaw winters and expansive clay both demand a deeper, fabric-separated base to resist heaving. USGA construction guidance rests on the same rule: a thoroughly compacted subgrade with no water-collecting depressions, because settling and standing water are exactly what kill a surface.
In plain financial terms, the sub-base is an insurance policy. It’s the layer that keeps settling and surface failure from turning a premium green into a do-over.
Precision Hydraulic Drainage System Design: Eliminating the Waterlogged Nightmare
The costliest drainage mistake is treating drainage as something you’ll deal with later. It has to be designed before the turf goes down — once the surface is installed, your only fix is demolition.
Build in a gentle slope, around 1–2%, so surface water has somewhere to go. On flat lots, in heavy clay, or in high-rainfall country, add a subsurface system: perforated pipe set in a gravel trench, running to a clear outfall, so water that works through the surface is carried away instead of pooling beneath the green.
Drainage planning sequence:
- Read the site: where does water already collect, and where can it leave?
- Set the finished slope (1–2%) toward that exit before any aggregate goes in.
- On flat or rainy sites, lay perforated pipe in gravel along the low lines, draining to a free outfall.
- Match the turf backing’s permeability to the base’s ability to evacuate water.
- Run a hose over the path and watch it work before the turf commits you.
Step four is the one even careful installers skip, and it’s worth a beat. Drainage has two separate properties: how fast water moves through (intensity) and how much the system can carry away (capacity). A wide-open, permeable backing over a base that can’t move the volume still floods — the water races down and then has nowhere left to run. Permeability and capacity have to be matched, top layer to bottom. Climate sets the bar here, too: an arid yard can run a simpler slope-and-base setup, while a rainy property needs real subsurface capacity built in. Engineer the water and the green stays true through the wettest week of the year.
The layer that sits on top of all this — and quietly affects how the green plays — is infill.
Infill Materials: The Hidden Variable That Controls Feel, Speed, and Durability
Infill is the granular material brushed down between the fibers, and on artificial outdoor putting greens, it pulls triple duty: it holds the blades upright, shields them from getting crushed, and acts as the speed knob you can turn after install. More infill, and the surface generally plays faster and firmer; less, and it slows.
For putting performance, fine silica sand is the call. A finer grade settles into the turf, supports the fibers evenly, and delivers the firm footing a true roll needs without choking drainage. One installer’s detail you won’t read on the label: rounded or coated sand resists breaking down and treats the fibers gently, while raw, jagged sand can sand the blades down over years of foot traffic, so the grade and shape matter as much as the amount. Crumb rubber earns its keep in playgrounds and on athletic fields where cushioning is the point, but it softens roll and bakes in the sun. Testing of infilled synthetic systems has recorded surface temperatures past 150°F, with no infill type or color cooling them meaningfully, which is why it’s no one’s first pick for a green. Turf Factory Direct’s putting green silica sand infill is graded for exactly this job.
Botched infill is one of the most common gripes after a DIY or budget install. Too little and the fibers lie flat and the green plays dead; too much and it goes bumpy; spread unevenly and the speed shifts under your feet as you walk. Done right, infill is what locks in the stimp you paid for and keeps the fibers standing season after season.
Cup Installation and Design Planning: Where Functionality Meets Architectural Integration
A cup set even slightly proud or loose will spit out good putts and lean the flag over time. For a clean, true-roll entry, the sleeve sits flush, the surrounding turf is held under even tension so there’s no lip, and — in freeze-thaw climates especially — the sleeve is anchored in concrete so frost and foot traffic can’t budge it. Leave clearance around each cup so the turf seats cleanly.
Past the hole, design is where a green stops being a slab and starts belonging to the property. Shape, contour, and a fringe collar decide both how it plays and how it reads from the patio. A little contour adds practice value and visual interest; too much turns a fast green unputtable. For a typical backyard, two to three pin positions is the sweet spot, enough to practice uphill, downhill, and breaking putts, and to mimic real course reads without overbuilding a modest footprint. Designed well, a green can claim a dead corner of the yard without disrupting how the rest of it flows.
The Investment, Installation, and Long-Term Ownership Guide
You’ve got the four fundamentals and how they connect. What’s left is money, labor, and upkeep, and that’s exactly where a confident buyer keeps a sound investment from quietly turning into a runaway budget.
Professional Installation Versus DIY: An Honest Cost-Benefit Analysis
The honest version: DIY is genuinely doable for the surface work and genuinely risky for the structural work. Laying and seaming turf, brushing in infill, cutting cups — a handy homeowner can learn those on a small, flat green. Excavation, base building, compaction, and drainage are where amateur jobs fail out of sight, only surfacing as settling and standing water once the turf is already down.
| Phase | DIY difficulty | Risk if wrong | Pro recommended? |
| Site prep / excavation | Moderate | Throws off everything above it | Helpful |
| Base & compaction | High | Lumps, settling — the #1 failure | Yes |
| Drainage | High | Waterlogging, full redo | Yes |
| Turf laying / seaming | Moderate | Visible seams, wrinkles | Optional |
| Infill / cups | Low–moderate | Wrong speed; fixable | Optional |
If you hire out, vet hard. Ask to see a portfolio of finished greens, ask specifically how they build and compact the base and design the drainage, and require a workmanship guarantee that covers the drainage system. Choose the right putting green company and source quality putting green turf and materials directly.
Understanding the True Cost of an Artificial Outdoor Putting Green
Cost follows size, materials, and complexity, and it lives in ranges, not a single sticker. Professionally installed greens run on a sliding per-square-foot scale. Counterintuitively, smaller greens cost more per foot because fixed setup costs spread across less area, while bigger greens get more efficient.
| Tier | Typical $/sq ft (installed) | What’s included | Best for |
| Budget / DIY | ~$5–$20 | Materials, modular or roll turf, basic base | Small, flat, casual greens |
| Mid-range | ~$20–$30 | Quality turf, engineered base, basic drainage | Most serious home practice greens |
| Premium | ~$25–$40+ | Top turf, full drainage, contouring, fringe | Performance and showcase installs |
The figures that blow up budgets are the ones buyers forget to price.
Hidden-cost checklist:
- Base construction
- Drainage engineering and pipe
- Cup hardware and sleeves
- Fringe turf, edging, infill, adhesives and seam tape
- Tool rental and debris disposal
As a rough split, base construction and drainage can swallow about half the total, with turf taking a big share of the rest. So shaving the base to afford flashier turf is precisely backward: you’re spending more on the part you see and starving the part that holds it up.
The argument for spending well upfront is durability. Quality materials and a properly built base shrink the maintenance and early-replacement costs that make a “cheap” green expensive. On returns, stay honest: a well-built green is an attractive, in-demand outdoor feature with real property-value enhancement potential, and for a golfer it offsets the recurring cost of practicing elsewhere, where private club dues commonly run a few hundred dollars a month and up. For a line-item breakdown, see our putting green turf cost guide.
Maintenance Requirements: Protecting Performance and Longevity
An artificial outdoor putting green asks for far less than natural grass: no mowing, no watering, no fertilizing. But “less” isn’t “none,” and the small routine has one real purpose: protecting the stimp you paid for.
| Task | Frequency | Why it matters |
| Brush against the grain | Weekly–biweekly | Stands fibers back up, restores consistent roll |
| Clear debris (leaves, organic matter) | As needed | Prevents staining and algae footholds |
| Redistribute / top up infill | Periodically; after heavy use | Keeps speed even and fibers protected |
| Rinse or treat for algae | Seasonally in damp climates | Heads off slick, discolored patches |
| Check drainage outfalls | Seasonally | Catches clogs before they cause pooling |
Tune the routine to your climate: brush and rinse more in rainy regions to stay ahead of organic buildup, mind heat and surface temperature in punishing sun, and clear frost gently rather than chipping at it. Neglect carries a real price; infill migrates, fibers mat, the surface slows and turns blotchy, and the green’s working life shrinks. Stay on it and it holds its speed and its looks for years.
Before You Break Ground — checklist:
- How much usable, reasonably level space do I actually have?
- Where does water drain now, and where can it exit?
- Is my soil sandy and free-draining, or clay-heavy and slow?
- How much direct sun does the spot get?
- What stimp, and how many pin positions, do I genuinely want?
- Am I building the base and drainage myself, or hiring that out?
Answer those honestly and the project stops being a gamble. It becomes a spec you can hand to a builder, or execute yourself, with your eyes open. Knowing the four fundamentals of an artificial putting green system — turf, base compaction, drainage, and infill — you now understand what to specify, what to ask from an installer, and what keeps a green from becoming a redo.
Frequently Asked Questions
How long does an artificial outdoor putting green last? A quality green commonly lasts around 15 to 20 years. Lifespan rides on fiber and backing quality, how much sun and traffic it sees, and whether the base was built right — budget builds and heavy use trend toward the lower end.
Can I install one myself? Partly. The surface work — laying turf, infill, cutting cups — is realistic DIY on a small, flat green. The base, compaction, and drainage are the high-risk phases where most amateur greens fail, and those are the ones worth handing to a pro.
What’s the biggest cause of a failed green? The base and drainage. Poor compaction causes lumps and settling; inadequate drainage causes waterlogging. Both hide underground until after the turf is down, which is what makes them so costly to fix.
How much maintenance does artificial outdoor putting greens need? Far less than natural grass: mainly periodic brushing to stand the fibers up, clearing debris, topping up infill, and a seasonal drainage check. No mowing, watering, or fertilizing.
How much does artificial outdoor putting green cost? Most installed greens fall in the range of roughly $15 to $40 per square foot. Smaller greens cost more per foot, larger ones less. When you’re ready to build, you can order putting green samples or browse putting green turf and materials from Turf Factory Direct.