


The six-footer leaves your putter on a perfect line, then wobbles left a foot short. The stroke was fine. The surface wasn’t. That’s the quiet fear behind every home green project: spending thousands on something bumpy, slow or soggy. The good news is that outdoor golf greens succeed or fail for predictable reasons, and almost all of them sit below the surface.
What makes a green roll true: The best outdoor golf greens roll true because of what you never see: a compacted, well-graded base that drains fast and carries gentle slopes that stay flattest around the cups.
Key Takeaways
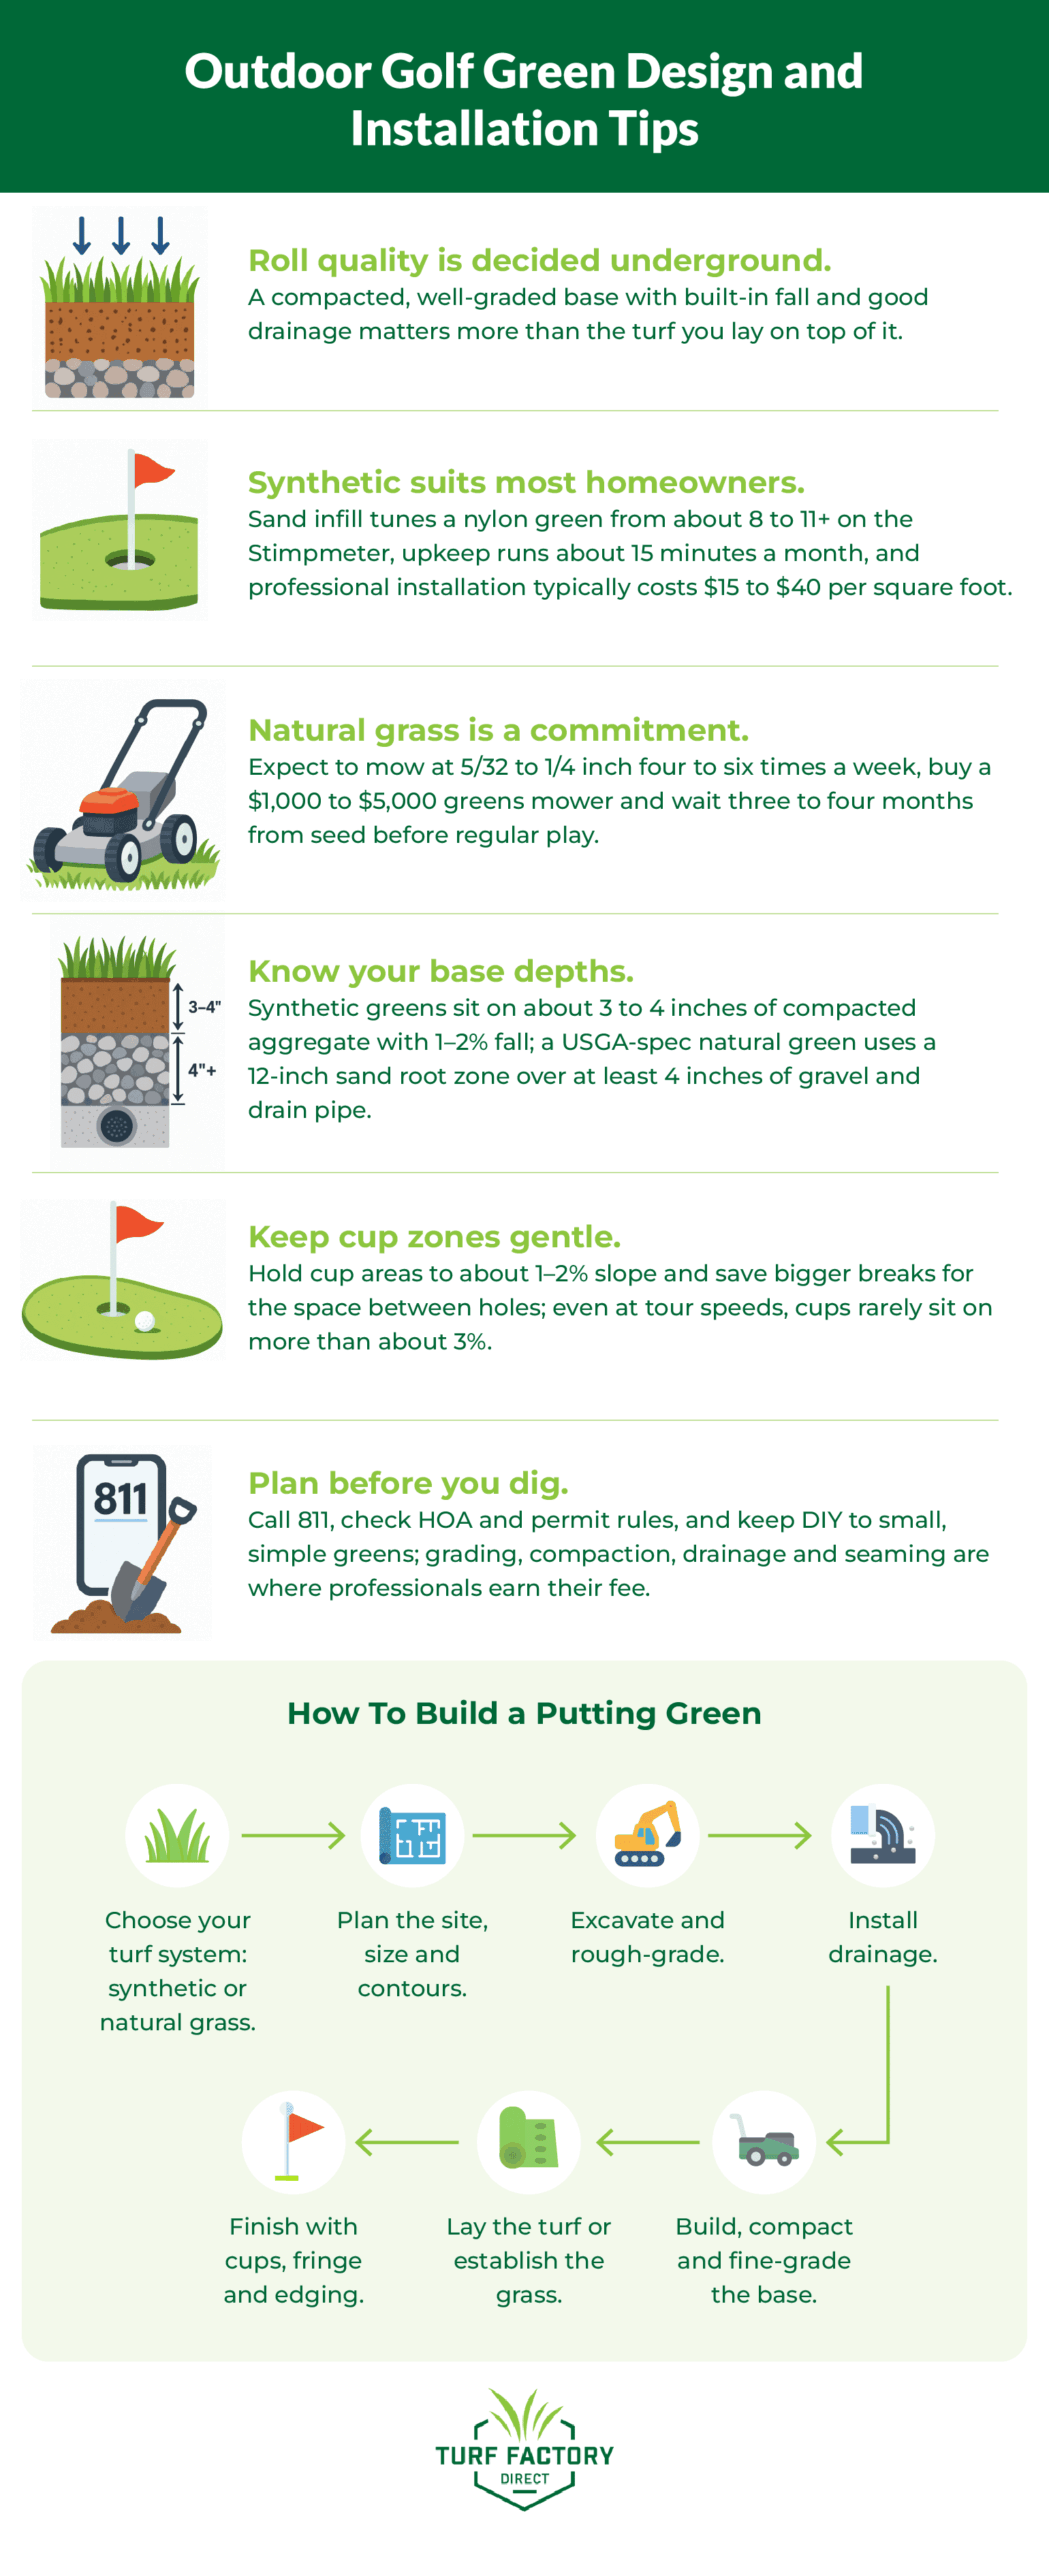
- Roll quality is decided underground. A compacted, well-graded base with built-in fall and good drainage matters more than the turf you lay on top of it.
- Synthetic suits most homeowners. Sand infill tunes a nylon green from about 8 to 11+ on the Stimpmeter, upkeep runs about 15 minutes a month, and professional installation typically costs $15 to $40 per square foot.
- Natural grass is a commitment. Expect to mow at 5/32 to 1/4 inch four to six times a week, buy a $1,000 to $5,000 greens mower and wait three to four months from seed before regular play.
- Know your base depths. Synthetic greens sit on about 3 to 4 inches of compacted aggregate with 1–2% fall; a USGA-spec natural green uses a 12-inch sand root zone over at least 4 inches of gravel and drain pipe.
- Keep cup zones gentle. Hold cup areas to about 1–2% slope and save bigger breaks for the space between holes; even at tour speeds, cups rarely sit on more than about 3%.
- Plan before you dig. Call 811, check HOA and permit rules, and keep DIY to small, simple greens; grading, compaction, drainage and seaming are where professionals earn their fee.
Choosing Between Synthetic Turf and Natural Grass
The turf decision comes first because it shapes base depth, drainage, irrigation and budget.
Comparing Synthetic Turf and Natural Grass Side by Side
For most homeowners, synthetic wins on consistency and effort, while natural wins for those willing to tend it.
Green speed is measured with a Stimpmeter, a simple ramp that releases a ball onto the green. The distance it rolls, in feet, is the green’s speed. A synthetic green’s speed is set by how much sand infill sits between the fibers. Natural grass speed follows mowing height. Penn State research found that cutting height had the single largest effect on speed: across cuts of 2/32 to 6/32 inch, each 1/32 inch lower added roughly 6 to 8 inches of roll. So a home grass green, mowed at the heights extension services recommend, usually plays at the slower end of course speeds.
| Criteria | Synthetic Turf | Natural Grass |
| Speed | Tunable with infill, about 8–11+ | Rises as mowing height drops |
| Consistency | Uniform year-round | Shifts with weather and growth |
| Feel and shot-holding | Close to real, sand-filled turf can receive chips | Authentic |
| Maintenance | Brushing, debris, infill top-ups | Mowing 4–6 times a week, plus feeding and pest control |
| Water use | Occasional rinse | Regular irrigation |
| Time to play | Days after the base | About 3–4 months from seed |
| Upfront cost | About $15–40 per sq ft installed | Varies, needs a greens mower |
| Long-term cost | Low | Ongoing inputs, water and labor |
Our guide to artificial outdoor golf greens covers synthetic systems in more depth. If you’re leaning that way, the specs below decide how your green will play.
Understanding How Synthetic Turf Specs Affect Roll
Pile height, fiber, density and infill decide how a synthetic green rolls, and all four appear on the spec sheet.
| Spec | What It Changes | What to Look For (Pure Putting Surfaces) |
| Pile height | Speed and trueness | About 3/8–1/2 in |
| Fiber | Resilience and feel | Texturized nylon fibers for putting |
| Face weight | Uniform contact, wear life | 36 oz per sq yd or more |
| Texture | Natural roll character | Texturized yarn |
| Infill design | Speed tuning, shot-holding | Built for silica sand |
Good putting green turf is designed around infill from the start. The ball doesn’t roll on the full pile. It rolls on the thin sliver of fiber left above the sand. More infill exposes less fiber and speeds the ball up; less infill slows and softens it.
Choose from our outdoor golf green turf selection:
- TFD Putting Elite uses texturized nylon at a 36 oz face weight and 7/16-inch pile, a strong baseline for serious practice.
- TFD Two-Tone Putt pairs 36 oz nylon at the same pile height with a two-color blend for a more natural look.
- TFD Birdie Putt Elite steps outside those putting-only specs on purpose: its 3/4-inch pile is built for silica sand and designed to replicate both roll and approach shots, so it trades a little pure putting fidelity for a single surface that also receives chips.
- TFD Nylon Putt Extreme uses texturized nylon at a 1/2-inch pile, with speed and spin tuned by infill, for players who want the most control.
Weighing the Agronomic Demands of Natural Grass
A natural green is living turf held at an unnatural height, and it needs attention most days to stay there. The University of Arkansas outlines this routine, and Purdue Extension gives a similar one, mowing at 3/16 to 1/4 inch and topdressing with screened soil:
- Mowing: 5/32 to 1/4 inch, four to six times a week, with a reel greens mower
- Fertilizing: small, timed feedings in late spring and fall
- Topdressing: about 1/8 inch of sand, brushed in each spring and fall
- Aerating: periodically, to relieve compaction
- Watering: early morning, only when the turf shows stress
- Pest control: occasional fungicide and insecticide
Creeping bentgrass, the cool-region standard, adds its own demands. UC IPM describes it as high-maintenance and shallow-rooted, and University of California Cooperative Extension turf specialists add low tolerance of drought and wear, plus high susceptibility to disease.
Matching Your Turf to Climate, Usage, and Upkeep Tolerance
Where you live and how you’ll use the green matter as much as which surface you prefer.
- Cool-season north: natural means creeping bentgrass; synthetic needs a backing that handles freeze-thaw.
- Warm-season south: natural means ultradwarf bermudagrass; synthetic needs UV-stabilized fiber.
- Transition zone: summers can be too hot for bentgrass and winters too cold for bermudagrass, so synthetic avoids the gamble.
- Water restrictions: synthetic skips the frequent irrigation grass needs.
- Kids, pets or guests daily: synthetic handles the traffic.
- Under an hour a month of upkeep: choose synthetic.
See more about the best outdoor golf greens for your climate. With the surface chosen, the next question is where it goes and how it’s shaped.
Planning Your Outdoor Golf Green: Site Selection, Layout, and Design Principles
Pick a sunny, well-drained, accessible spot, size it for how you’ll play, then shape gentle contours.
Evaluating Your Site: Dimensions, Orientation, and Landscape Integration
The right site saves money before a shovel hits the ground. Walk the yard after heavy rain and note where water sits. Never build either type of green in a low spot.
Once you have a likely spot, call 811 before you dig, a free national service that sends locators to mark underground utilities. Check HOA rules and local codes too, since requirements vary.
Pre-build site checklist:
- Space measured, with room for fringe
- Direct sun hours noted
- Trees, roots and leaf drop assessed
- Airflow open
- No low spots, water drains in more than one direction
- Utilities marked through 811
- Access for equipment, turf rolls and stone
- HOA and permit rules confirmed
Sizing Your Green for Performance and Functionality
Size sets how many cups you can cut and how much variety the green gives you. An outdoor golf green of around 500 square feet is common, and HomeAdvisor calls that size a practical balance between variety and simple upkeep, with room for several cups and real lag putts.
| Green Size | Typical Holes | Best For | Notes |
| Under ~300 sq ft | 1–2 | Short putts | Often one turf width |
| ~300–700 sq ft | 3–4 | Regular practice | Room for modest contours |
| ~700–1,500+ sq ft | 5+ | Serious practice, entertaining | Plan seams with contours |
For layout ideas, see our guides to small outdoor golf greens and large outdoor golf greens.
Designing the Shape and Contour of Your Green
The faster a green rolls, the flatter its cup areas need to be. That rule underpins good contour design.
Organic outlines look authentic and create more putting angles than a rectangle. At the 2024 U.S. Open, with greens rolling about 14, Golf Digest reported that a 3% grade was the practical limit for a cup, and most pins sat on 2.5% or less. A slower home green can carry slightly more, but the principle holds: keep cup areas gentle and put bigger breaks between them. For scale, 2% is about 2.4 inches of fall over 10 feet.
| Slope | Effect on Roll | Where to Use It |
| About 1–2% | Gentle, readable break | Cup zones |
| About 2–3% | Clear break, harder to stop as speed rises | Approaches, between cups |
| 3% and up | Strong break, ball may not stop | Tiers and features away from cups |
Treat these as speed-dependent guidance, and use design software or a landscape architect to preview contours. A good design only rolls true, though, if the ground beneath holds it.
Building the Foundation: Excavation, Grading, and Drainage
The base and drainage are the most important parts of the build and the hardest to fix later.
Excavating, Grading, and Engineering the Putting Green Base
A true surface needs a stable, compacted base; turf won’t hide dips. The sub-base is the crushed-stone layer under the turf, and compaction presses it firm so it won’t settle.
For synthetic, excavate about 3 to 4 inches on residential greens and fill with crushed aggregate or decomposed granite. Compact it with a plate compactor, since hand tamping won’t hold, and grade to at least 1–2% fall for drainage.
| Synthetic Layer | Material | Typical Depth | Purpose |
| Subgrade | Native soil, compacted | n/a | Stable, shaped platform |
| Weed barrier (optional) | Geotextile fabric | n/a | Limits weeds |
| Base | Crushed aggregate or decomposed granite | About 3–4 in excavation | Support and drainage |
| Top layer | Fine aggregate, compacted | Thin | Smooth finish |
Natural greens go deeper. The USGA’s construction recommendations call for a 12-inch sand-based root zone, where roots grow, over at least 4 inches of gravel and perforated drain pipe. The sand-over-gravel layering is designed to hold a reserve of water in the sand and then drain the excess fast, so roots get moisture without sitting in it.
| Natural (USGA) Layer | Material | Typical Depth | Purpose |
| Subgrade | Native soil, contoured | n/a | Directs water to drains |
| Drain pipe | Perforated pipe in gravel | At least 4 in diameter | Carries water away |
| Gravel | Clean washed gravel | At least 4 in | Drainage layer |
| Root zone | Sand-based mix | 12 in | Balances water, air and roots |
A full USGA build is expensive. For lightly used backyard greens, Purdue and the University of Arkansas both name sandy loam as the ideal native root zone, and Arkansas rules out clay. On native soil, the Arkansas guidance calls for subsurface drains less than 10 feet apart.
Base-building sequence (synthetic):
- Mark the outline after utilities are located.
- Remove sod and organic matter.
- Excavate to depth.
- Shape and compact the subgrade.
- Install any subsurface drains.
- Lay weed barrier if used.
- Spread aggregate in layers, moistening and compacting each.
- Laser- or string-line-grade, then compact the fine top layer.
- Hose-test for dips and puddles.
| Mistake | Result | How to Avoid It |
| Light compaction | Dips within months | Compact in layers |
| Dead-level base | Puddling | Build in 1–2% fall |
| Low-spot location | Chronic wetness | Choose higher ground |
| No edge restraint | Turf creep | Install edging |
| Clay under grass | Failing turf | Use sandy soil with drains |
Engineering Putting Green Drainage Beneath and Across the Surface
Water is the enemy of every green, and drainage is the main defense. Standing water softens a synthetic base, shifts infill and drowns grass roots.
A French drain is a gravel-filled trench, usually with a pipe inside, that carries water away underground. Perforated pipe has holes along its length so water can enter anywhere. To test your site, dig a hole, fill it with water and time the drain. If water lingers for hours, as it often does in clay, plan subsurface drains. Route the discharge away from your foundation, following local rules.
| Drainage Feature | When You Need It | Synthetic | Natural |
| Surface grade | Always | At least 1–2% fall | Drain in more than one direction |
| Perimeter French drain | Uphill runoff, wet edges | Protects the base | Protects edges |
| Subsurface pipe | Clay soils, all USGA builds | Under poorly draining bases | Under 10 ft apart on native soil |
| Turf and base permeability | Synthetic greens | About 30 inches per hour benchmark | n/a |
With a stable, well-drained base in place, the finishing work decides how professional the green looks and feels.
Installing Your Green: Synthetic and Natural Methods
Synthetic installation comes down to seams, infill and edges. Natural installation comes down to the root zone and patience. Careful putting green installation protects the base work you’ve already paid for.
Installing Synthetic Turf: Infill, Seams, Edging, and Finishing
On synthetic, infill is the speed control and the finishing details make the green look like a course. Infill is sand brushed between the fibers to support them and tune the roll.
Fine silica sand infill is the standard: inert, durable and consistent. Coarse landscape sand is wrong for putting. Plan on about 2 pounds per square foot, brushed in over several thin passes.
| Infill | Speed Effect | Firmness | Putting Suitability |
| Fine silica sand | Faster as depth rises | Firm | Standard choice |
| Crumb rubber | Bouncy | Soft | Sports fields, not greens |
| Organic infill | Less predictable | Variable | Rare on greens |
Installation sequence:
- Unroll the turf and let it relax in the sun.
- Cut to shape from the back.
- Seam with tape and adhesive, keeping fiber direction consistent.
- Secure the perimeter.
- Set cups flush with the finished surface.
- Brush in infill in thin layers to target depth.
- Install fringe and edging.
Fringe is one of the most underrated details in home green design; without it, the green looks dropped in. TFD Elite Fringe has a 1-inch pile, tri-color yarn and perforated backing for drainage. TFD Supreme Fringe offers a 1 1/8-inch field-green pile with dual backing. Matching fringe and infill complete both the look and the roll of a TFD green.
Establishing a Natural Grass Green: Soil Preparation and Grow-In
A natural green is grown, so waiting is part of the build. Preparation means building the sand or sandy-loam profile, controlling weeds and installing even irrigation. Soil fumigation, sometimes called sterilization, uses restricted-use products that only licensed pesticide applicators can buy and apply.
The USGA says bentgrass from seed needs about three to four months of good growing weather before regular play, and sod roughly halves that. A northern green seeded by mid-August is usually ready around the next Memorial Day.
Deciding What to DIY and When to Hire a Pro
Homeowners can handle the finishing work; the base is where pro equipment earns its fee. DIY putting green installation makes most sense for simple greens under about 200 square feet, built by someone with construction or landscaping experience.
| DIY-Friendly | Best Left to a Pro |
| Sod removal and clean-up | Laser grading |
| Infill brushing | Layered compaction |
| Routine maintenance | Drainage design |
| Small, simple greens | Multi-piece seaming |
| Edging touch-ups | USGA root-zone builds |
Questions to ask any installer:
- How deep will you excavate, and with what material?
- How will you compact it, and in how many layers?
- How will you check the finished grade?
- Where does the water go?
- Where will seams sit relative to cups?
- How will you set the speed?
Bringing Your Outdoor Golf Green to Life
That six-footer that wobbled left was never really about the putt. The best outdoor golf greens are decided underground, in the base, grade and drainage, long before the first stroke. Get those right, choose a surface that fits your climate and the time you want to give it, and the ball does what your stroke tells it to.
Your next steps:
- Choose your turf system.
- Assess and measure your site.
- Check HOA and permit rules.
- Sketch size and contours.
- Plan base and drainage.
- Compare putting turf options.
- Decide between DIY and professional installation.
Whether you install it yourself or work with a contractor, true roll starts beneath the surface and finishes with a putting turf engineered for it. Explore outdoor golf greens from Turf Factory Direct to find the surface that fits your game.