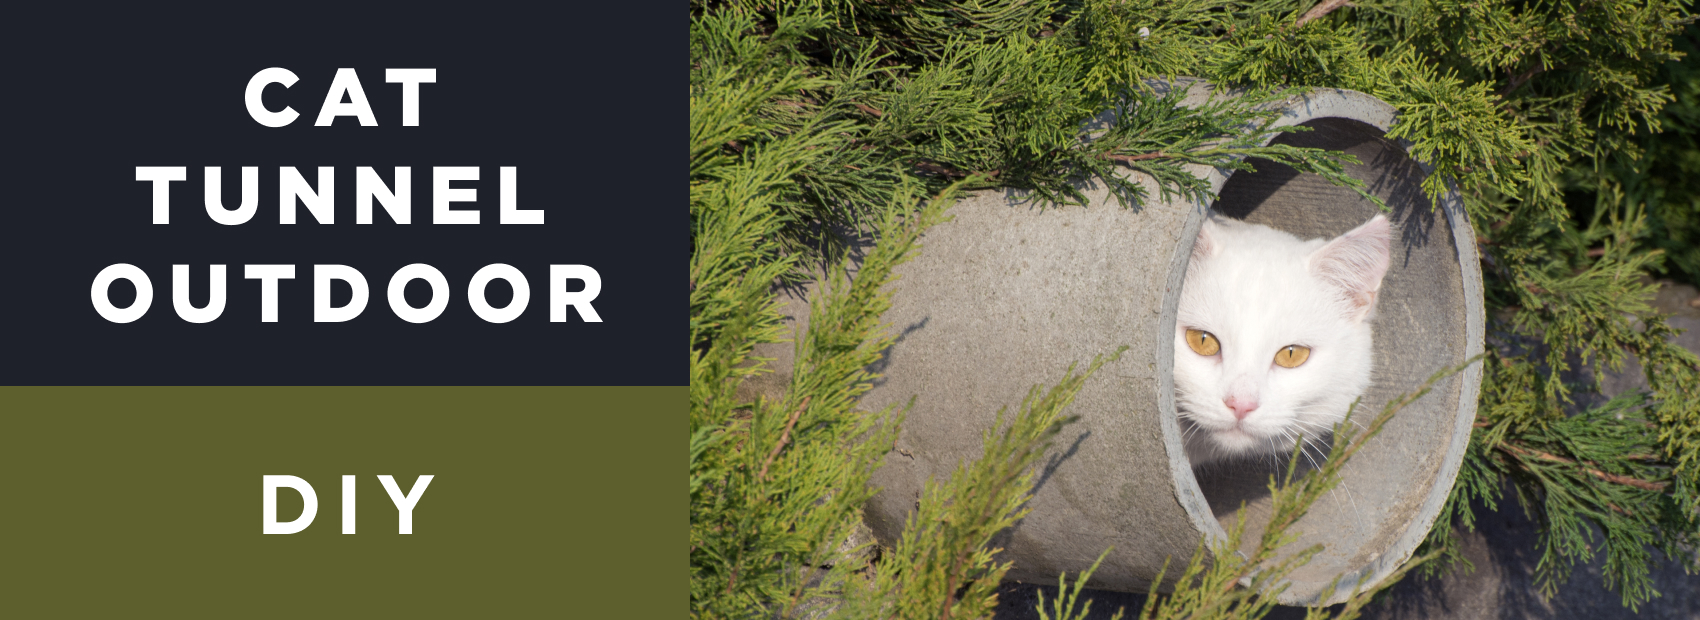
You’ve seen the look: your cat at the window, pawing at the glass, ears twitching at every bird call. They want out. And you want to give them that freedom, just not the risk that comes with it.
A cat tunnel outdoor DIY is the perfect middle ground. It offers fresh air, garden views, and birdsong, without the dangers of traffic, predators, or wandering off. These tunnels connect your home to a catio or secure outdoor cat enclosure, giving your cat safe, enriching access to the outside world.
With $200–$500, a free weekend, and basic materials like outdoor lumber, PVC piping, and wire mesh, you can build a tunnel tailored to your space and your cat’s adventurous spirit. It’s a small project with a big payoff, both for their joy and your peace of mind.
Key Takeaways
- A DIY tunnel lets your cat safely roam outdoors without exposure to traffic or predators.
- Durable materials and smart building methods extend the tunnel’s lifespan and keep cats protected.
- Custom layouts allow flexibility to fit your yard, patio, or architectural constraints.
Planning Your Cat Tunnel Outdoor DIY Project
To build a tunnel that’s safe, sturdy, and actually fun for your cat to use, start with a clear plan. Begin by mapping the layout, then dig into the structural and environmental details.
Determine the Purpose (Connecting to Catio, Garden, the Backyard)
Decide where your cat tunnel outdoor DIY will lead. Linking to a catio offers a highly controlled outdoor environment, perfect for lounging and watching birds flutter by.
Garden connections allow for structured, supervised access. If you go this route, define clear zones bordered with secure fencing for peace of mind.
For backyard setups, plan the tunnel path with natural supervision in mind. Position it where you can watch your cat from a window or workspace.
Consider extra access points when linking to larger spaces. This helps reduce tension between multiple cats and gives shy ones a quick retreat if startled by sudden noises or bossy siblings.
Measure and Map the Route From House to Destination
Choose a direct and logical tunnel route, measuring the full length carefully. Include slopes, corners, and obstacles in your estimate. Think of it like planning a scenic walking trail that’s just for paws.
Identify exit spots like windows, doors, or basement hatches. Second-floor exits need extra stability. Ground-level pet doors offer easier access and smoother transitions for older or less agile cats.
Make a clear sketch that includes:
- House exit
- Planned turn points
- Tunnel supports
- End destination
Watch for things like downspouts or electrical boxes that could interfere with tunnel placement.
Consider Optimal Dimensions (Height, Width, Length)
Tunnel width should be 24–30 inches, enough for cats to move past each other and accommodate fun extras like perches.
Use these height benchmarks:
- Minimum: 16 inches
- Comfortable: 24 inches
- Spacious: 30–36 inches
Stick to 6–8 foot segments to make installation easier and more stable. For longer routes, space out wider rest areas every 10–12 feet to reduce stress and let cats pass each other comfortably, or just stretch out and soak in the view.
Assess Sun Exposure and Weather Conditions
Match your design to local weather. Snow-prone areas need strong support beams and pitched roofing. High-heat climates require shade and airflow.
Blend sun and shade along the route. South-facing areas stay warmer in cold months.
Use proper drainage methods:
- Sloped flooring
- Drilled holes at the bottom
- Slightly elevated edges
Add overlapping roof panels and gasketed joints to block water and debris while keeping the tunnel dry and secure.
Budget and Cost Considerations
Expect to spend $200–$500 on materials, based on how complex and long the cat tunnel outdoor DIY project is:
- Wood framing: $75–$150
- Mesh or fencing: $50–$100
- Fasteners and brackets: $30–$80
- Roofing and sealants: $45–$100
Tools you’ll need (if not already owned):
- Drill
- Saw
- Level
- Snips for mesh
Spending more upfront for durable outdoor-grade supplies like galvanized mesh or pressure-treated wood helps avoid frequent repairs later.
Evaluate Your DIY Skill Level and Time Commitment
Skills needed include:
- Taking accurate measurements
- Cutting boards or mesh cleanly
- Drilling and screwing into wood
- Framing simple structures
Set aside 2–3 weekends:
- Weekend 1: Build and place frames
- Weekend 2: Attach mesh panels
- Weekend 3: Seal edges and install weatherproof features
If the design includes multiple levels, suspended sections, or unusual turns, consider whether to seek help or simplify your first build.
Essential Materials and Tools
For safety, comfort, and durability, pick materials designed to withstand outdoor exposure and wear, and make sure you’ve got the right tools for assembly.
Weather-Resistant Wood (Cedar, Pine, Pressure-Treated)
Cedar is naturally insect- and rot-resistant, making it ideal. Western red cedar is particularly long-lasting and smells pleasant.
ACQ-treated pine costs less and holds up well outdoors. Look for “ground contact”–rated boards for structural elements.
Use pressure-treated lumber for posts or sections that touch soil. Choose pieces marked as safe for pets and residential use. Your cat might sniff, scratch, or rub against every inch.
Wood Sizing Suggestions:
- 2x4s for framing
- 1x6s for walls
- 4x4s for main supports
Protective Mesh Materials (Chicken Wire, Wire Mesh, Fencing)
1-inch hex chicken wire (16-gauge or heavier) is flexible and easy to work with. It is ideal for curved sections or playful shapes.
Welded wire mesh (14-gauge, 2×1-inch grid) gives more security and holds shape better. It’s great for permanent tunnels or homes with cheeky raccoons or nosy neighbors’ dogs.
Key Mesh Qualities:
- Weatherproof coating (so it doesn’t rust when it rains)
- UV-treated finish (so it doesn’t get brittle under the sun)
- Tight gaps to prevent paw injuries
- Strong enough to block other animals
Fasteners (Screws, Staples, Zip Ties)
Use stainless or coated deck screws (2½-inch) to build solid wood joints that won’t wobble or loosen over time.
Secure mesh with 1/2-inch crown, 1-inch leg galvanized staples.
For quicker layout, use heavy-duty zip ties rated to 175 lbs. Always follow up with permanent fasteners for anything load-bearing. That tunnel needs to withstand a determined leap from a 4kg fluff missile.
Weatherproofing Supplies (Sealants, Paint)
Clear silicone caulk is ideal for sealing seams and joints, keeping water, bugs, and cold breezes out of your cat’s cozy corridor.
Outdoor wood stain or paint not only adds character, it protects the wood from fading, cracking, and warping. Go for formulas with mildew resistance and UV blockers for the best long-term results.
Other Items to Have:
- Wood preservatives (especially for humid climates)
- Primer (for longer-lasting paint jobs)
- Waterproof clear coat
Required Tools List for Beginners
Hand Tools:
- Measuring tape
- Level
- Hammer
- Screwdriver set
- Tin snips or wire cutters
Power Tools:
- Circular saw
- Cordless drill
- Staple gun
Safety Gear:
- Gloves (especially when handling mesh)
- Safety glasses
- Dust mask
Optional Materials for Customization (Artificial Turf, Etc.)
Soft flooring improves traction and comfort. Try a UV-resistant carpet or turf with pet-safe backing, it turns a plain tunnel into a mini-green runway.
Clear panels like plexiglass help weatherproof areas without blocking visibility. Your cat can still spot every squirrel while staying dry during a drizzle.
Other fun upgrades:
- Ramps or shelves
- Rope-wrapped posts
- Outdoor cushions
- Potted grass or catnip in secured planters
Remember, your cat tunnel outdoor DIY should blend comfort and safety — turf with pet-safe backing achieves both.
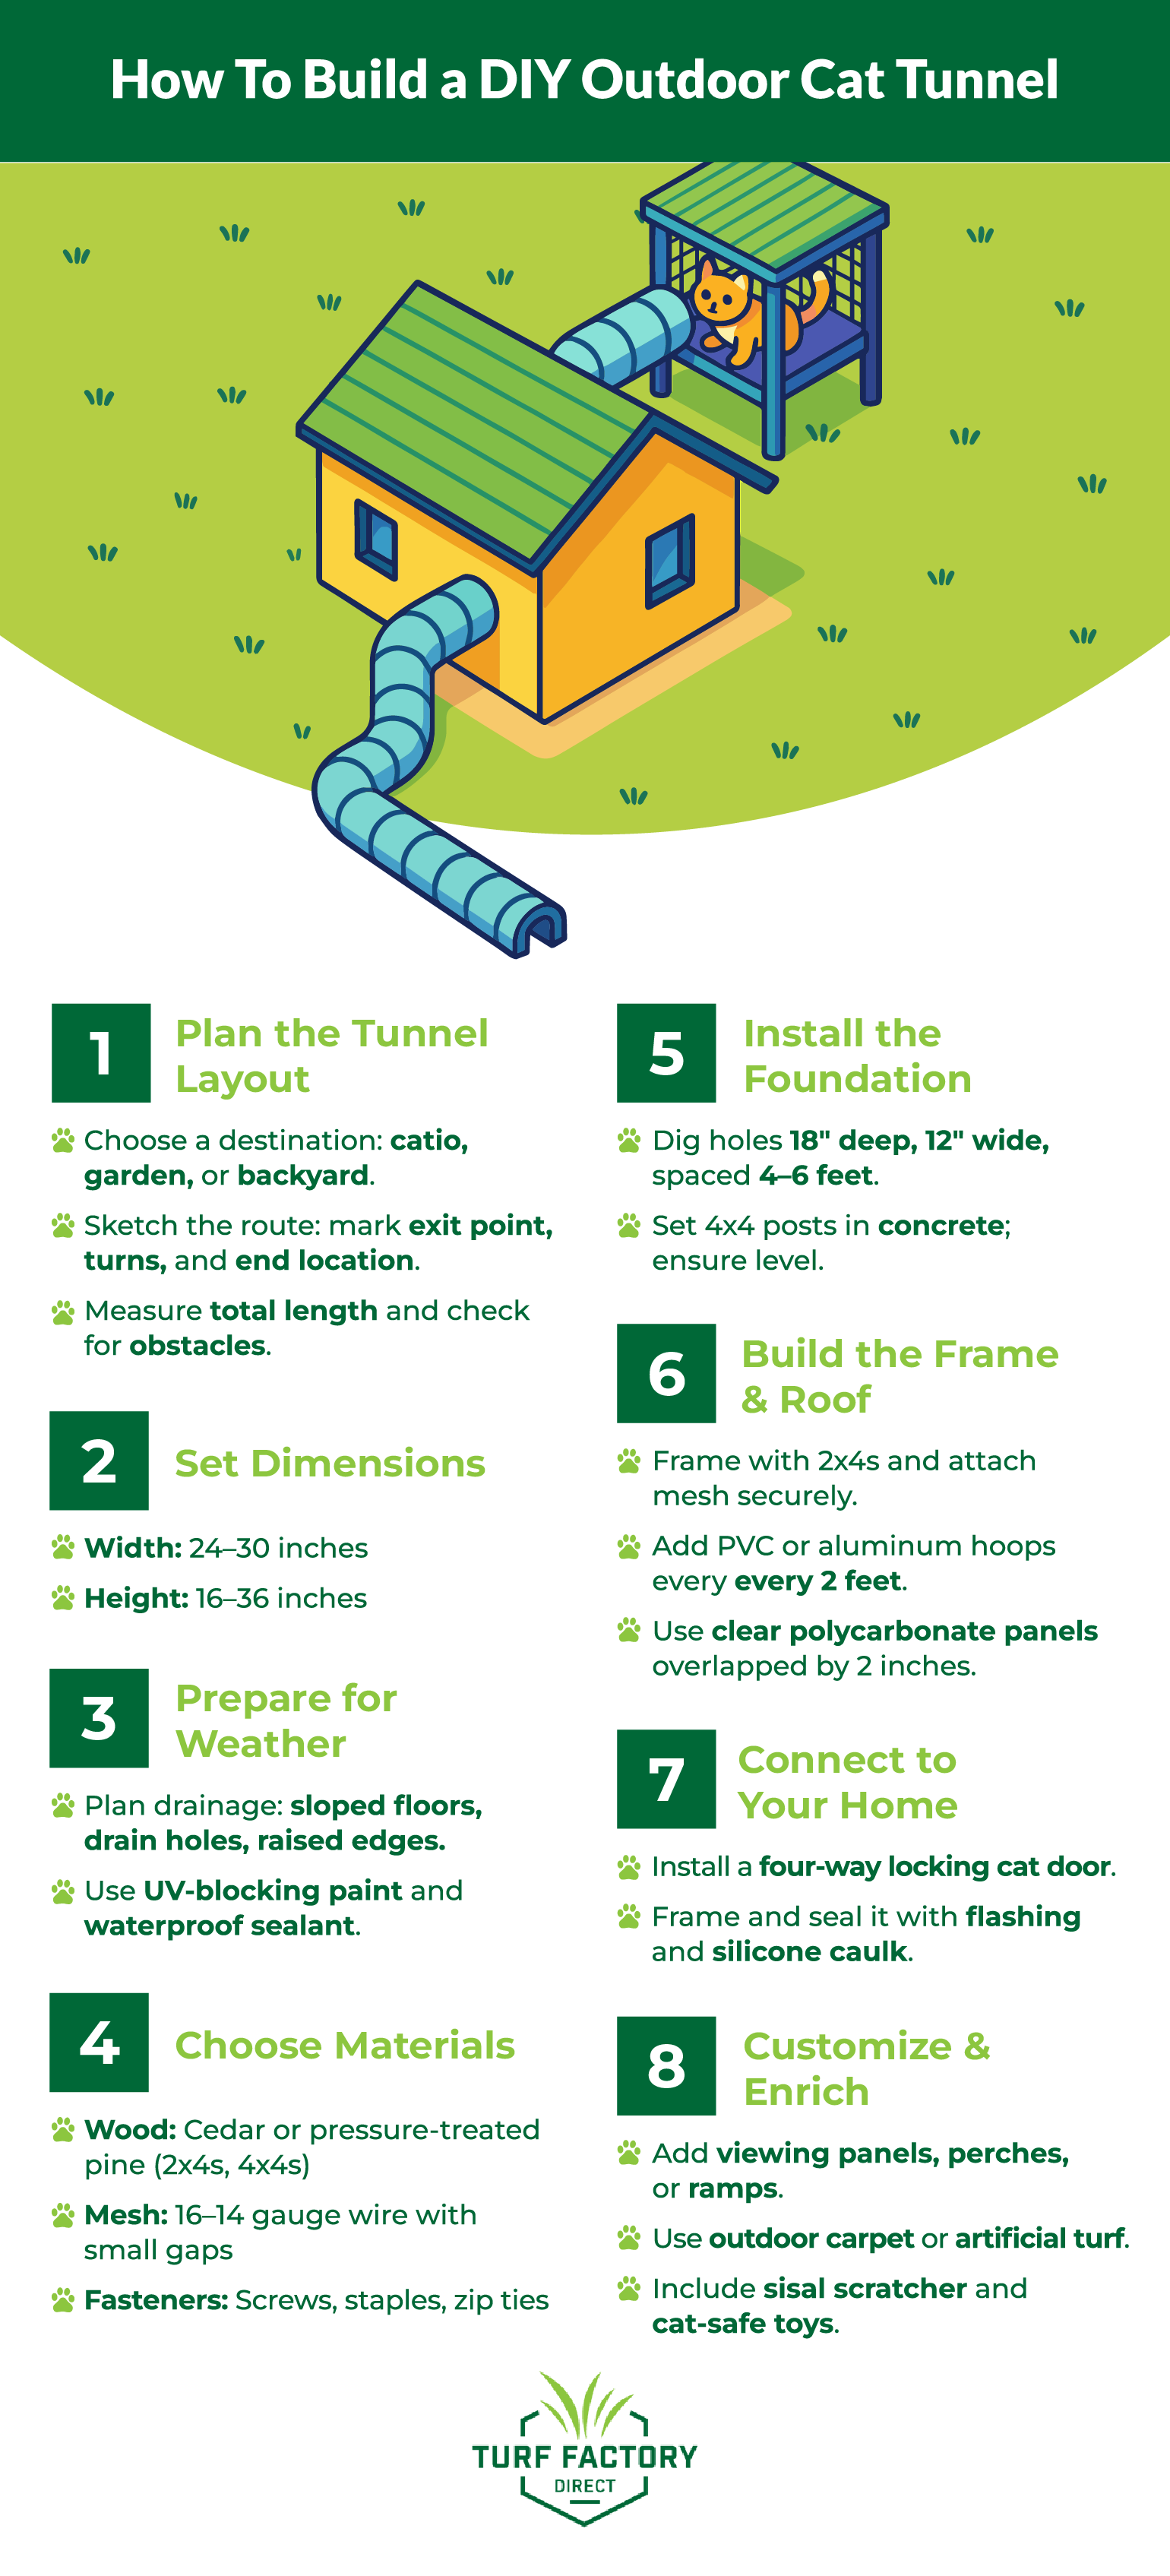
Constructing the Cat Tunnel Outdoor DIY for your Backyard
With plans in place and materials ready, you’re set to build a tunnel that’s solid, weatherproof, and custom-fit for your space.
Creating a Solid Foundation and Support System
Outline your route using stakes and string. Clear the surface of debris and grass. A clean, measured start saves a world of frustration later.
Dig support holes every 4–6 feet. Each should be 18 inches deep and 12 inches wide. Pour fast-setting concrete into holes and set your posts while checking they’re level.
Pro tip: Mark your post depths with painter’s tape beforehand to keep things consistent. It saves you from the dreaded “dig, check, re-dig” routine.
Measurements to Note:
- Hole depth: 18 inches
- Hole width: 12 inches
- Spacing: 4–6 feet
Use pressure-treated 4x4s for these base posts. Give them a few hours to set properly. It’s tempting to rush, but this step decides the tunnel’s backbone.
Building the Tunnel Frame Structure
Build the tunnel frame using cut 2x4s secured between posts.
Use flexible conduit or PVC pipes to create the arched top. Space these every 2 feet for support. This arch makes the tunnel feel more open and comfortable, no hunched cat walks here.
Frame Specs:
- Width: 24 inches
- Height: 36 inches
- Arch spacing: 24 inches
Secure corners with angle braces and screws. Use corrosion-resistant fasteners throughout. You don’t want a tunnel that starts squeaking or sagging after the first rain.
Pro tip: Label your pieces before you start screwing things in. A little prep = a smoother build.
Installing and Securing Wire Mesh/Fencing
Use 16-gauge welded mesh with small openings. Cut sections a few inches larger than needed because bigger cuts allow for easier installation. Trim after fastening for cleaner lines.
Pull the mesh taut around the frame and secure first with zip ties every 6 inches. Follow up with staples or screws and washers. Zip ties buy you time and flexibility; staples seal the deal.
Smooth down sharp edges and secure loose ends thoroughly.
Adding a Protective Roof Element
Add clear polycarbonate roof panels. Overlap them by 2 inches for leak protection.
Build a 1–2 degree slope so rain flows off naturally. Screw panels down with rubber washers.
Attach drip strips to guide runoff away from tunnel seams.
Pro tip: Install panels from the lowest to the highest point as it helps with overlapping and drainage. Attach drip strips to guide runoff away from tunnel seams. No cat wants to be caught mid-tunnel in a surprise leak.
Constructing and Installing Access Points
Make service doors from matching lumber and mesh. The standard size is 24×36 inches–big enough for cleaning and maintenance, but small enough to stay secure.
Use three heavy-duty hinges per door, plus a latch that locks securely. Weather-strip doors will prevent cold air and water from getting inside.
Pro tip: Add a carabiner or padlock if you’ve got raccoons or clever dogs nearby.
Connecting to Your Home (Cat Door Installation)
Choose a four-way locking cat flap. Avoid cutting through structural studs or power lines when selecting your wall spot.
Frame the door opening with flashing and seal it fully using silicone.
Confirm the door flap moves freely and seals when closed before attaching the tunnel. Cats hate stuck doors, and once they’re spooked, good luck getting them to try it again.
Connecting to Destination (Catio, Outdoor Cat Enclosure)
Build up a strong frame where the tunnel meets your catio or cat house in the garden. Connecting to an outdoor cat enclosure gives your cat freedom within a protected zone, perfect for expanding your cat tunnel outdoor DIY.
Use overlapping lumber and flexible joiners to handle shifting ground or rain expansion. Reinforce this junction and ensure it’s dry and secure.
Design Considerations for Safety and Durability
Your tunnel needs to stay safe and solid in every season. That means smart design choices and strong materials that keep your cat secure no matter the weather. This is where your planning pays off, with a cat tunnel outdoor DIY that stands strong year-round and lets your cat explore without worry.
Weather Resistance Strategies for Different Climates
Warm climates benefit from sun-reflective paints and materials like PVC with UV coatings. Reapply sealant every 6–12 months for durability.
Cold climates need insulation and sloped roofing to handle snow. Install rubber strips at seams and joints for better temperature control.
Add drainage holes at floor level every 4 feet, and use rust-resistant hardware to avoid failure points. Every smart drainage hole is one less puddle, one less problem.
Climate-Specific Tips:
- Sunny areas: UV-treated mesh, sealed wood
- Cold/snow: Raised bases, insulated walls
- Wet areas: Overlapping roofing, slope built-in
Bonus tip: If you’re in a flood-prone area, a raised tunnel isn’t just wise, it’s non-negotiable. You will sleep better knowing you built it to last.
Proper Ventilation and Sunlight Exposure
Drill side vents every 3 feet and cover them with metal mesh. These help circulate air and reduce condensation inside the tunnel. You will be giving your cat a breathable, fresh-feeling path instead of a stuffy hallway.
Create both sun-drenched and shady spots using overhangs or fabric covers. Cats like to move between different temperatures.
Seasonal vent covers or removable panels offer control during extreme weather.
Good Vent Practices:
- Two vents per 6-foot run
- 30% shade coverage or more
- Ensure airflow from multiple sides
Structural Support Requirements Based on Length
Place support posts every 4 feet for low tunnels. Use 3-foot spacing for taller structures to prevent bending or sagging.
Set ground posts (4x4s) 2 feet deep in concrete. Elevated tunnels need bracing diagonally at corners and heavy-use spots.
Key Load Guidelines:
- Max span between posts: 4 feet
- Post thickness: 4 inches
- Depth: 24 inches in soil
Access Points for Maintenance and Cleaning
Install an access panel every 8 feet. Use 18-inch wide openings that hinge securely but open easily.
Make some floor panels removable. Use snap latches that secure well but open with minimal tools. Quick access means less stress, because when something needs cleaning, you’ll want to get in and out fast.
Keep access doors away from where cats typically walk to avoid accidental escapes.
Escape-Proof Construction Techniques
Layer your mesh system for security. Use a solid base mesh (like 1/2-inch hardware cloth) with overlapping seams. Reinforce all corners with steel brackets and glue all joints before screwing together.
Check weak points like:
- Tunnel-to-wall joints
- Corners
- Access panels
- Post attachments
Predator-Proofing Considerations
Select thick mesh (16-gauge or better) with holes under 1/2 inch wide. This is your first line of defense against raccoons and stray dogs.
Set up solar motion lights to scare off predators after dark.
Airlock-style entries prevent escape if one gate is accidentally left open.
For extra protection, bury a mesh barrier 12 inches deep beneath the tunnel’s entire length.
Enhancing and Maintaining Your Cat Tunnel
Keep your tunnel sturdy, secure, and fun with a little ongoing care. A few thoughtful touches can make it even more enjoyable for your cat.
Enhancing Your Cat Tunnel
Install transparent viewing windows using acrylic panels. Place them at different heights to give curious cats unique sightlines.
Add small cat-size gates at multiple points to allow flexible traffic control, especially with more than one cat.
Include platforms, ramps, or shelves for cats to perch or rest mid-journey. Line these with outdoor carpet or wrap them in sisal for scratching.
Rotate out accessories like toys or small cat-safe planters to keep the tunnel stimulating and fresh. It’s like changing up the scenery on their favorite walk. Keep their mind sharp and boredom at bay.
Maintenance and Upkeep
Walk the tunnel weekly and check corners, fasteners, and mesh for signs of movement or damage.
Clean floor sections with a pet-safe disinfectant. Sweep out leaves, toys, or any clutter.
Inspect seals and roof sections every few months. Replace weatherproofing as needed to prevent leaks. Water damage is sneaky. A quick inspection keeps those dreaded drips from ever starting.
Test hinges and locks monthly. Add lubrication as needed to prevent squeaks or jams.
Troubleshooting Common Issues
If panels loosen, retighten screws and add new fasteners where needed. Things shift with time. Your job is to notice early and tighten them back into place.
Puddles forming? Re-check slope, clear any blocked drain holes, and elevate areas that collect water.
Patch mesh holes immediately—cats and pests alike can slip through small gaps.
For sagging, reinforce with extra braces or reduce span length. Add windbreak panels where gusts create movement and instability.
Give Your Cat the Outdoors Without the Risks
A cat tunnel outdoor DIY is a smart way to give your cat the outdoor experience they crave without the dangers that come with free roaming. With the right materials and a solid plan, you can build a safe, weather-resistant structure that fits your yard and your cat’s personality.
Whether it’s a quick walk to the catio or a winding garden adventure, your tunnel can offer enrichment, exercise, and peace of mind for both of you.
Ready to start building? Turf Factory Direct has high-quality pet-friendly artificial turf, perfect for lining your cat tunnel outdoor DIY. Check out all the options for turf with pet-safe backing and get your project rolling today.