Originally posted on September 15, 2022
Picture yourself relaxing in your comfy armchair on the porch, as the evening breeze wraps you in a cool embrace that evokes deep memories. The artificial grass in your yard appears so realistic it nearly seems genuine.
In addition to the stunning look, artificial grass is durable, low-maintenance, pet-friendly, cost-effective, and long-lasting. It gives you a sparkling green space that is consistent throughout the year.
However, artificial grass can be a pain sometimes. Wrinkles and big creases in your grass can be a nightmare, messing up your once breathtaking compound. The ugly lawn can be daunting, but not today.
Here’s why: Preparation and planning are everything for a stunning lawn. Before installation, ensure every aspect of the installation guide is followed, such as stretching the grass tight to push out creases. For post-installation care, follow the artificial turf maintenance guide
6 Issues Homeowners should prevent Before installation
Why does an apple a day keep the doctor away? Well, it’s because prevention is better than cure. In this context, looking for your artificial grass on a daily basis will ensure that you trace problems on time and correct them before the situation runs out of hand.
Maintaining artificial turf is effortless. You don’t need to sprinkle any water. You need to conduct a routine check by doing the following.
1) Rolling Out / and Heating / Sunning Grass
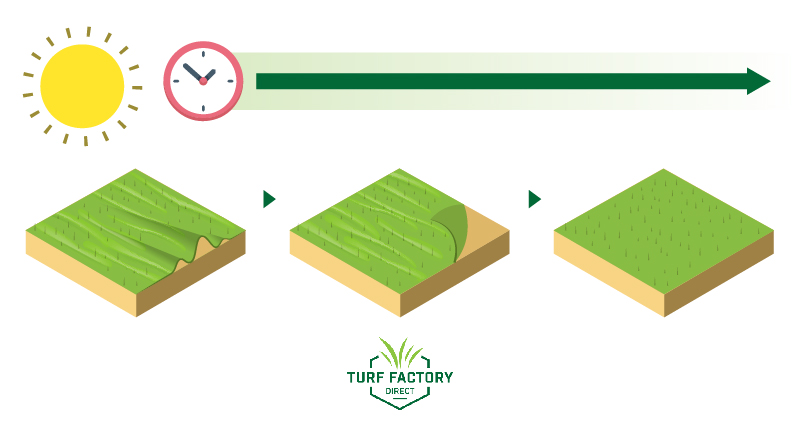
Once in a while, lift the turf, and roll it out for a few minutes or hours. To roll out the turf effectively, start by unrolling the joining tape. Secondly, grab one edge of the turf and unroll it from the ground; if you have another helping hand, the better because you can unroll the turf evenly simultaneously.

Repeat the process on the other side of the turf. After unrolling the turf, ensure you also check for any debris or mold growth on the ground and clear it before rolling the turf back into its position. Do this once a week.
2) Brushing Out Irregular Areas
Brushing out irregular areas ensures the grass is uniform and gives your lawn that outstanding appearance. Check the edges and stretch them out because that’s where most irregular arrears and crisps develop.
If you come across joints, ensure you clear them on time by following our detailed guide.
3) Pulling Out Creased Areas
Creases should not worry you. They’re a normal occurrence in turf. You only need to brush the affected areas. Furthermore, you can roll out the grass and stretch the affected areas.
4) Flipping and Pulling Trouble Areas
When you’ve done everything, but the creases won’t disappear, it’s time to flip it over. Roll out your entire turf for approximately one to two hours to warm it. The warmth softens the turf and makes it easy for you to stretch and clear the creases.
After that, flip your turf back to the ground and pull the affected area again. The creases should be gone, leaving you with a beautiful flat lawn.
5) Letting Rest In Sun For Multiple Days/Acclimate If Cold
It’s always good to normalize pulling out artificial grass and sunning it for a few days. Your grass can be damaged during extreme cold, creating a putrid smell. To avoid complete damage to your lawn, give the turf time to acclimate to the sun, typically after the cold season.
6) Making Sure Turf Isn’t Too Old / Manufacturer Defect
While you might be concerned about your turf maintenance after installation, pre-installation checks are equally important. If you buy counterfeit turf or turf that has been stored for a long time, you’ll end up with a pile of turf in your garage.
Ensure that you buy a tried-and-tested, high-quality landscaping turf from an established manufacturer.
Bonus Tip: Patience pays. The crazy-sweet thing about turfs is that they can last for multiple decades. However, you’ll have to follow the due process during installation. Slow but sure, your lawn will turn out to be the signature of your compound.
If you need quality turf that will last for decades, ensure you order your products from a recognized, reputable brand likeTurf Factory Direct.
11 Critical Tips for Eliminating Lines During (& Sometimes After) Installation
Turf lines change the outlook of your lawn because they’re not so beautiful. Lines can occur during the manufacturing process or after installation when the sun is scorching. However, the lines and wrinkles should be less of your concern. Here are some critical tips to eliminate them.
1) Ruffled/disturbed fibers from the packaging before sending them out
A small nugget here: always check your turf before it’s offloaded because it might have loose fibers direct from the vendor. Get your products from verified vendor outlets to avoid this kind of drama.
2) Always hand or power broom the turf prior to filling
A power broom removes trash and debris effectively. The broom is excellent for maintaining playgrounds and cleaning dog odors.
3) Ensure the grass is facing the right direction
To get a natural look at your lawn, ensure your grass blades are facing in the same direction. Generally, your turf pile direction should point towards your most common outdoor living areas.
For example, the grass blades on your front lawn will face the street, while the grass blades in your backyard lawn will often be positioned to face outdoor living areas or your house.
4) Ensure the ground is level
With clear, level ground, you will avoid creases and irregular areas. A well-laid level ground also has a stunning welcome look on your lawn and stops the grass from sinking.
5) Make sure all prep work has been done before starting your cuts
Don’t rush the process of installing your turf. All the prep work should be done in a professional way to avoid creases. After everything is in order, you can lay your turf and start the cutting process.
6) Ensure the turf has the correct type of infill and the manufacturer’s recommended quantity
Turfs come in different qualities for different purposes. Before purchasing grass, ensure you state where you want to use it. A sports turf is different from a compound turf. Lastly, get high-quality grass from renowned outlets.
7) Ensure turf infill is evenly distributed
Sands work best as an infill. However, ensure you distribute the sand evenly if you want the grass to always be straight even after being stepped on.
8) Make sure the seams are properly positioned
When joining your turfs together, ensure they’re correctly positioned. Start by laying the pieces of grass approximately 2 cm apart. Next, put a joining tape between the joins with the shiny side of the tape facing down. Apply the adhesive.
After that, pull both sides of the grass together evenly to close the center margin. Do this slowly to ensure you get a perfect alignment between the pieces of grass when positioning them together.
9) Make sure nails aren’t causing divots or irregular areas
Divots expose the ground and cause the turf to have irregular portions in some areas. When using the nails to secure the perimeter of the grass, ensure you don’t damage the turf.
10) Ensure the grass is taut while being secured
If you don’t want your grass to slack, ensure that it’s stretched before it’s secured by either nails or glue.
11) Ensure that edges are secured well and check for poor corner and edge issues that may be allowing creases to appear elsewhere
As we discussed earlier, creases emanate from the edges and prevent them. You’ll have to secure the edges tightly. Once you’re done, your lawn will have an even and fabulous look.
Conclusion
Beautiful lawns are lovely sights to behold. Artificial grass beautifies your compound and takes fewer resources and time to maintain. For different people, though, turfs have not worked out for them due to the availability of counterfeit and old turfs in the market.
We have good news for everyone. At Turf Factory Direct, we offer top-tier quality synthetic turf that will last for several decades. Our team of experts is ready to take you through the whole process and offer you professional advice.
All you need to do is to give us a call today, and we’ll show you the greener grass on the other side.


