A well-rolled putt across a green you built yourself—that’s the goal. Learning how to install a putting green saves 40-60% compared to hiring a contractor, and the process breaks down into seven steps: (1) select and measure your site, (2) excavate and grade the area, (3) install weed barrier and drainage, (4) build and compact the base layers, (5) lay and secure the artificial turf, (6) add contours and install cups, and (7) apply infill and test playability. Most homeowners finish in 1-3 days at $5-15 per square foot, depending on size and complexity.
This guide covers each step in detail—plus the tools you’ll need, mistakes to avoid, and honest guidance on when professional help makes sense. Whether you’re building a compact 150-square-foot practice pad or an elaborate short-game complex, the fundamentals hold: proper base preparation determines putting quality. Shortcuts here create problems that cost more to fix than doing it right the first time.
The growing popularity of backyard putting greens reflects what serious golfers already understand: consistent short-game practice separates single-digit handicaps from everyone else. A home green eliminates excuses and turns idle minutes into productive reps.
Key Takeaways
- Seven-step process: Site selection → excavation → weed barrier/drainage → base layers → turf installation → contours/cups → infill/testing
- DIY cost: $4.50-11.50 per square foot for materials; professional installation runs $15-40 per square foot
- Timeline: 1-3 days for most projects (150-600 sq ft)
- Base preparation is non-negotiable: Achieving 95% compaction density requires a plate compactor—hand tamping is the #1 cause of DIY failure.
- Cup specifications: Regulation cups measure 4.25″ diameter × 4″ minimum depth per USGA rules.
- Savings: DIY delivers 40-60% cost reduction versus professional installation.
Before You Begin: Assessing Your DIY Readiness
Before ordering materials, take an honest inventory. A DIY putting green project is achievable for moderately handy homeowners, but it’s not a casual weekend task.
What Skill Level Is Required?
Installing a putting green compares in complexity to building a paver patio or constructing a raised deck. If you’ve completed either successfully, you have the foundational skills. The work requires basic measuring and layout, comfortable use of hand and power tools, physical ability to move aggregate materials, and patience for precision during base preparation.
No specialized training is necessary, but attention to detail matters enormously. The difference between a surface that rolls true and one that looks nice but putts poorly almost always comes down to base quality.
Realistic Time Investment
Project timelines vary with size.
A small green of 150-300 square feet typically requires 1-2 days for one person working steadily, or a solid weekend with a helper. Medium installations of 300-600 square feet generally take 2-3 days, with base preparation consuming most of the first day. Large or complex greens exceeding 600 square feet may require 3-5 days. Projects with significant grading challenges or multi-tier designs often benefit from professional assistance.
These estimates assume a sustainable pace. Rushing base preparation to save time is the most common cause of long-term dissatisfaction.
When to Hire a Professional
DIY makes sense for straightforward projects, but certain conditions favor professional help: significant grading or drainage challenges requiring earth-moving equipment, complex multi-tier designs with dramatic elevation changes, limited time or physical constraints, and desire for tournament-quality contours requiring specialized shaping experience.
A poorly executed DIY installation costs more to fix than professional work would have cost initially. Know your limits.
Planning Your Backyard Putting Green Installation
Smart planning prevents headaches and wasted materials. The decisions you make now affect every subsequent step.
Choosing the Right Location
The “perfect” spot rarely exists—you’re looking for the best available option.
Sunlight and Drainage
Partial shade during the hottest hours is ideal. Artificial turf in full sun can reach surface temperatures significantly higher than shaded areas, making barefoot practice uncomfortable in summer. Natural drainage directing water away from structures is essential—avoid low spots where water pools after rain.
Steer clear of areas directly under trees with heavy leaf drop or sap production. Accumulated organic debris accelerates infill contamination and increases maintenance.
Size Based on Practice Goals
For putting-only practice, 150 square feet minimum (roughly 10′ × 15′) provides adequate space for meaningful stroke work. Putting with chipping approach requires 300-500 square feet. Full short-game practice with multiple approach angles typically needs 500+ square feet.
Larger isn’t automatically better. A well-built 200-square-foot green you use daily beats a 600-square-foot green that overwhelmed you during installation.
For compact yards, explore creative ideas for small putting greens.
Designing Your Layout
Shape Considerations
Organic, curved shapes look more natural and are more forgiving during installation—slight imperfections blend into flowing lines. Geometric shapes require precise cutting and reveal errors more readily, though they suit modern landscapes.
Walk your planned space with a tape measure and mark the perimeter with spray paint or a garden hose. Live with the layout for a day before excavating. Adjustments are free now and expensive later.
Planning Slopes and Contours
Professional greens typically feature 1-3% slopes for drainage and putting interest. For DIY installations, subtle undulations work better than dramatic breaks—you can add complexity on your next project.
Sketch your design on paper, marking high and low points. Keep slopes consistent with your yard’s natural drainage rather than fighting existing grade.
Hole Placement
Plan 2-3 cups minimum for practice variety. Position them at varying distances from edges, maintaining at least 18-24 inches from cup center to any perimeter—closer placement causes premature edge wear.
Consider traffic patterns. Avoid placing cups directly in your walking path to the green.
For layout inspiration, see more about backyard golf greens from concept to reality.
Materials Checklist for DIY Putting Green Installation
Gather everything before excavating. Mid-project supply runs waste time and momentum.
Essential Materials
- Artificial putting green turf: Square footage plus 10% for cuts and waste. Quality matters; this is what you’ll interact with daily. Browse putting green turf options.
- Crushed stone/gravel base: Class II road base or decomposed granite for 4 inches of depth.
- Fine sand or decomposed granite topping: For the 1-2 inch finishing layer.
- Weed barrier fabric: Commercial-grade, matching excavation footprint plus 12 inches overlap.
- Seaming tape and adhesive: If your green width exceeds a single roll. Position seams perpendicular to your primary putting direction—less visible, less likely to affect ball roll.
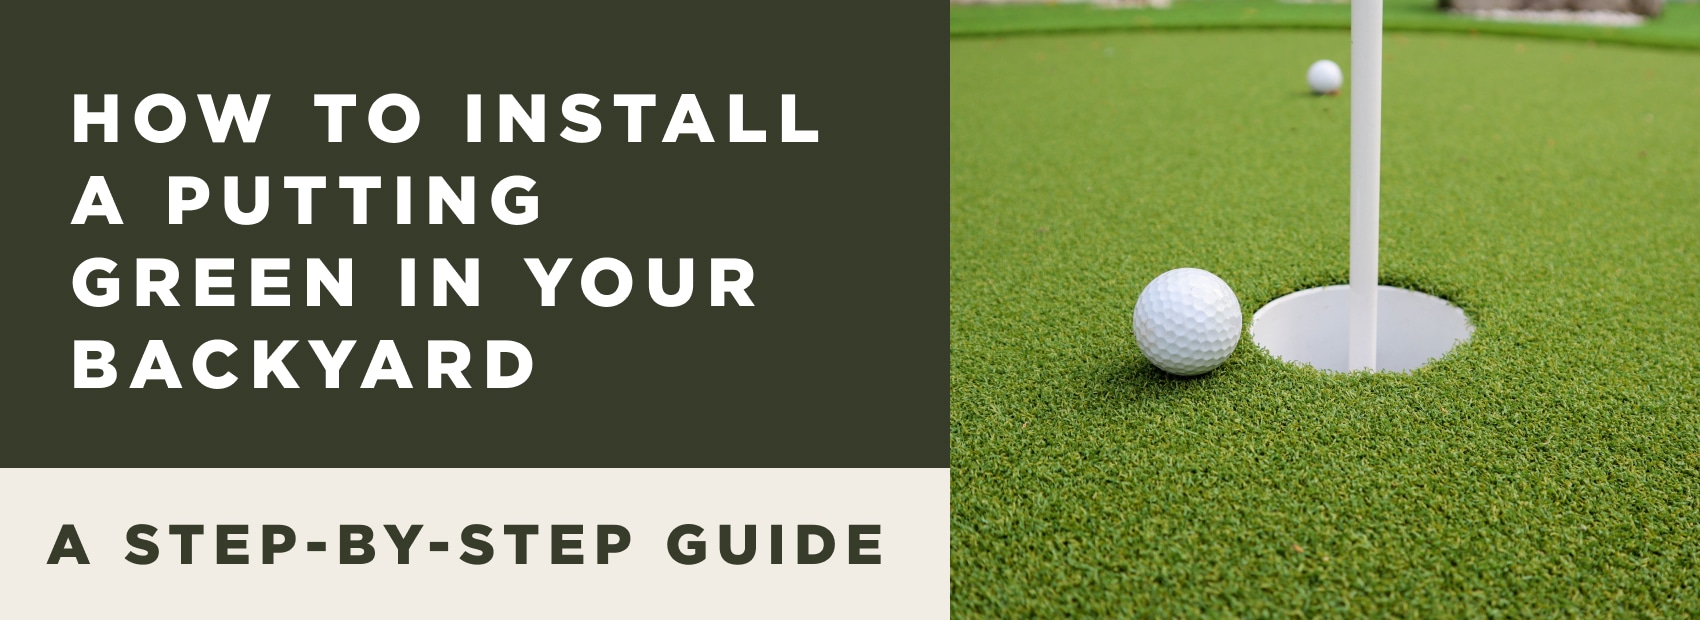
- Putting green cups and flagsticks: Regulation cups measure 4.25 inches (4¼”) diameter by at least 4 inches deep per USGA specifications. Plan for 2-4 cups.
- Landscape edging: Aluminum, steel, or composite. Rigid materials maintain cleaner lines than flexible plastic.
- Landscape staples: Approximately 1 per linear foot of perimeter, plus seams.
- Silica sand infill: Typically 1-2 pounds per square foot. See silica sand infill specifications.
Tools Required
Likely Already Owned: Tape measure (25′ minimum), utility knife with extra blades, landscape scissors, shovel and rake, wheelbarrow, 4-foot level, work gloves, knee pads.
Likely Need to Rent:
- Plate compactor (~$75-100/day) — Non-negotiable. Achieves the 95% compaction density considered the benchmark for optimal compaction in construction applications. Hand tamping cannot replicate this result and remains one of the most common causes of DIY putting green failure.
- Sod cutter (~$70-90/day) — If removing existing grass.
- Heavy lawn roller — For final settling after infill.
- Seam roller — For pressing seams into adhesive.
Budget Breakdown
Material Costs Per Square Foot
Quality turf runs $3-8 depending on pile density and backing. Base materials add $1-2. Infill, edging, cups, and miscellaneous contribute $0.50-1.50.
Total: $4.50-11.50 per square foot
Sample Budgets
- 200 sq ft: $900-2,300
- 400 sq ft: $1,800-4,600
- 600 sq ft: $2,700-6,900
Tool rental: $100-200 total.
DIY vs. Professional Context
Professional installation runs $15-40 per square foot. On a 400-square-foot green, DIY saves $2,400-11,600.
Cost-Saving Strategies
Order samples first to verify quality before committing. Source base materials from landscape supply yards—bulk pricing runs 30-50% lower than retail. Rent tools only for days you need them. Choose organic shapes that minimize cutting waste.
Ready to price your project? Browse our putting green turf selection.

Step-by-Step Putting Green Installation Process
Materials gathered, design finalized—time to build. Follow these steps in sequence. Skipping ahead creates expensive problems.
Step 1: Site Preparation and Excavation
Marking the Area
Outline your final shape with spray paint or a garden hose. Add 6 inches beyond the planned perimeter for edging workspace. This extra excavation disappears beneath edging and landscape but prevents cramped conditions at the edges.
Removing Existing Vegetation
A sod cutter provides fastest removal with the cleanest result. A flat shovel works but requires significantly more effort.
Remove all organic material—grass, roots, debris, rocks larger than 1 inch. Excavate to 4-6 inches below desired final grade to accommodate base layers (3-4 inches compacted gravel, 1-2 inches sand) plus the turf itself.
Establishing Grade
Your finished surface should slope 1-2% away from structures for drainage. Use stakes and string line to establish consistent depth. Check with a level at multiple points—inconsistencies now become visible in your finished surface.
Critical Warning: Failing to remove all organic material is among the most common excavation errors. Decomposing roots and grass create voids, causing settling and uneven areas within 1-2 seasons. Thorough removal now prevents frustrating repairs later.
Step 2: Installing Weed Barrier and Drainage
Weed Barrier
Lay commercial-grade landscape fabric across the entire excavation. Overlap seams 6-12 inches—weeds find gaps with remarkable persistence. Extend fabric 6 inches up the sides; trim later after base installation.
Secure temporarily with landscape staples to prevent shifting.
Drainage
In well-draining sandy or loamy soils, your gravel base typically provides adequate drainage. In clay or poor-draining soils, install a French drain or channel at the low point, directing water to an appropriate outlet.
Verify grading directs water toward drainage and away from structures. Correcting drainage after installation requires removing everything above it.
Step 3: Building the Base Layer
This is the most critical step. Proper putting green base preparation determines how your green performs for the next 15-20 years.
Gravel Base
Add crushed stone in 2-inch lifts, compacting each before adding the next. With your plate compactor, make minimum 3-4 passes in different directions over each lift. This achieves the 95% compaction density required for long-term stability.
Target total compacted depth: 3-4 inches.
Check level frequently—this layer establishes final grade. Adjustments later require removing sand and turf.
Sand Layer
Add 1-2 inches of fine sand or decomposed granite. Rake smooth, maintaining planned grade and any subtle contours. Compact lightly—firm, not cement-like.
The surface should be firm enough that footprints barely indent. If your feet sink more than 1/4 inch, compact further.
Quality Check: Place a 4-foot level across the surface in multiple directions. No deviation should exceed 1/4 inch. Your turf mirrors whatever lies beneath—a lumpy base guarantees a lumpy putting surface regardless of turf quality.
Step 4: Laying the Artificial Turf
Preparation
Unroll turf and let it acclimate in the sun for 1-2 hours. This relaxes the backing and reduces curl, making handling easier.
Position with grain direction running toward your primary putting direction. Putting green turf has directional nap—balls roll faster with the grain, slower against it. Consistent orientation ensures predictable speed.
Allow turf to extend 3-4 inches beyond your perimeter. Trim to exact fit after positioning.
Cutting and Fitting
Use a sharp utility knife—dull blades tear fibers. Replace blades frequently.
Cut from the back where you can see the backing clearly. For curves, make small relief cuts rather than forcing the turf to bend.
Seaming Multiple Pieces
Butt edges together without overlapping—fibers should intermingle naturally. Apply seaming tape beneath the join, then adhesive per manufacturer specs. Press firmly with a seam roller, working from center to ends.
Allow adhesive to cure (typically 2-4 hours) before proceeding.
For additional detail, see our complete artificial turf installation guide.
Step 5: Securing Edges and Installing Edging
Trimming
With turf positioned and seams cured, trim to exact perimeter. Leave turf extending slightly onto the edging area—it should tuck against edging, not gap from it.
Clean, straight cuts. Ragged edges announce “DIY project” rather than “quality installation.”
Installing Edging
Position at turf perimeter. Top should sit at or slightly below turf level—high edging creates a visible line and trip hazard.
Secure with stakes per manufacturer instructions.
Securing Turf
Drive landscape staples every 6-8 inches around the perimeter, angling to maximize hold. Heads should sink below fiber level.
Final Check: Walk the perimeter, pulling gently on edges. No lifting or gaps. Secure any loose sections.
Step 6: Creating Contours and Installing Cups
Subtle Contours
For simple breaks, add small amounts of sand beneath turf at desired high points before final securing. Pull back turf, add sand in a gradual mound, smooth transitions, replace turf.
Dramatic contours need to be designed into the base layer—attempting them now rarely works.
Test ball roll before finalizing. Putts should break as intended.
Installing Cups
Mark hole locations, maintaining 18-24 inches from cup center to any edge.
Cut turf in an X pattern at each location. Fold back flaps. Excavate to cup depth plus 2 inches—regulation cups are 4.25″ diameter × 4″ deep, so excavate 6 inches total.
Set the cup and verify it’s level. The rim should sit approximately 1/8 inch below surrounding turf—this slight recess prevents balls from bouncing out on firm putts.
Backfill around the cup with sand. Fold turf flaps back and trim excess around the rim. Turf should meet the cup edge cleanly.
Start with 3 cups. You can always add more later.
Step 7: Applying Infill and Final Testing
Infill Application
Use silica sand designed for putting greens—not play sand. Particle size and shape matter for consistent roll.
Apply with a drop spreader for even distribution. Target 1-2 pounds per square foot, verifying against your turf’s recommended rate.
Brush into fibers with a stiff push broom, working multiple directions. Apply in several light passes rather than one heavy application.
Why Infill Matters: It stabilizes turf backing, provides weight to prevent shifting, and affects ball speed. More infill creates slower roll; less creates faster. Adjust to your preference.
Professional greens measure 7-12 feet on the Stimpmeter depending on many factors. Home greens needn’t match tour speed—most recreational golfers prefer slightly slower surfaces that forgive imperfect strokes.
Final Rolling
Roll the entire surface with a heavy lawn roller to settle infill and ensure complete turf contact with base layers.
Testing
Putt from multiple positions and distances. Any wobble or deflection indicates a base issue—pull back turf, correct, replace.
If speed seems inconsistent, infill distribution may be uneven. Add to fast areas; brush deeper into slow areas.
Expect to top up infill after 30-60 days as materials settle. This is normal.
See silica sand infill and top dressing for maintenance supplies.
Maintenance and Long-Term Care
A well-built green requires minimal maintenance—but minimal isn’t none.
Weekly
Brush the surface with a stiff broom to keep fibers upright. Remove leaves, debris, and organic matter. Check for pet damage or displaced infill.
Monthly/Seasonal
Check edges for lifting and re-secure as needed. Add infill to thin spots. Rinse periodically to remove dust and pollen.
Annual
Deep clean with garden hose and mild detergent if needed. Inspect base for settling or soft spots. Top up infill across entire surface.
Enhancing Your Practice Area
Once your putting green performs well, consider additions for a complete short-game facility.
Chipping/Approach Area
Different turf with higher pile mimics fairway or rough lies. Position adjacent to your green for chip-to-the-green practice. The approach pad offers a pre-configured solution.
Fringe Installation
Different turf around your green perimeter mimics course conditions. Adds visual appeal and trains you for fringe putts you’ll face during rounds.
Practice Bunker
For serious golfers with space, a bunker represents the ultimate addition. This is an advanced project—consider it after your putting green proves successful.
For comprehensive setup inspiration, explore how to achieve the perfect roll for golf greens at home.
Frequently Asked Questions
How much does it cost to install a putting green yourself?
DIY runs $4-20 per square foot for materials versus $15-40 for professional installation. A 400-square-foot green costs approximately $1,800-4,600 in materials—savings of $2,400-11,600 over professional work.
How long does it take to install a backyard putting green?
Most DIY installations require 1-3 days. A small green under 300 square feet can be completed in a weekend. Larger or complex designs may need 3-5 days.
What base works well for a putting green?
Compacted crushed stone (3-4 inches) topped with fine sand or decomposed granite (1-2 inches). The critical factor is compaction—achieving 95% density requires a plate compactor.
How long do artificial putting greens last?
Quality turf with proper installation and maintenance lasts up to 20 years. The base can outlast the turf if drainage remains functional.
Can I install a putting green on a slope?
Yes, but slopes exceeding 2% require additional grading. Subtle 1-2% slopes actually improve drainage and add putting interest. Steep slopes may require terracing.
Your Backyard Putting Green Awaits
The seven steps outlined here—site selection, excavation, drainage, base preparation, turf installation, cup placement, and infill application—transform an empty yard into a practice facility that serves your game for decades. The process rewards patience and precision: every hour spent on base preparation pays dividends in consistent ball roll and long-term durability.
Base preparation is non-negotiable—rent the plate compactor and use it properly. Quality turf makes the difference in daily playability—samples let you verify before committing. Take time with each step rather than rushing.
Start by ordering putting green turf samples to evaluate quality, color, and pile characteristics. Once you’ve selected your turf, browse our complete putting green turf selection to finalize your purchase.
There’s a particular satisfaction in stepping out each morning to practice on a green you built yourself—knowing exactly what went into it, trusting the surface beneath your feet, and watching your short game sharpen with every session.